New user guide
Welcome to Amadeus Sales & Catering - Delphi Select!
Learning a new system can be overwhelming—especially at work when you already have so much to get done. Don't worry, we've taken the liberty to automate tedious tasks so you can focus on selling. This system was designed by hospitality professionals and doesn't require hours of training classes—you can log in and learn as you go.
Log in and verify your account
Your system administrator will create a new account for you. You'll receive an email notification from Support@salesforce.com. The Subject line will be “Welcome to Salesforce: Verify your account”. Click Verify Account and follow the on-screen instructions. The verification link does expire—usually after 7 days. Didn’t get the email? First, check your Spam or Clutter folders. If you still can’t find it, or if your link has expired, contact us and we’ll resend it.
Now it's time for you to log in—follow these steps:
- Navigate to the Login page https://login.salesforce.com/
- Enter your User Name, Password, and click Log In
Turn on Training & Help
Now that you're logged in, if you don't see the inline Training & Help panel, click ![]() at the top-right corner of the page to turn it on. This is your training program! As you move throughout the system the information will update and guide you through each process.
at the top-right corner of the page to turn it on. This is your training program! As you move throughout the system the information will update and guide you through each process.

There are lots of different ways to enter a booking. We'll take you through one common workflow. Feel free to log in now and follow along.
Let's use the example of a three-day corporate meeting. Anthony Gibbs with Platinum Industries wants to hold his company's quarterly meeting for 20 people at your property. Each person is staying in a king room and they'll have meetings from 8:00 AM to 5:00 PM, breakfast, lunch, and breaks. They're arriving on November 3rd, meetings start on the 4th, departing after the meetings end on the 6th.
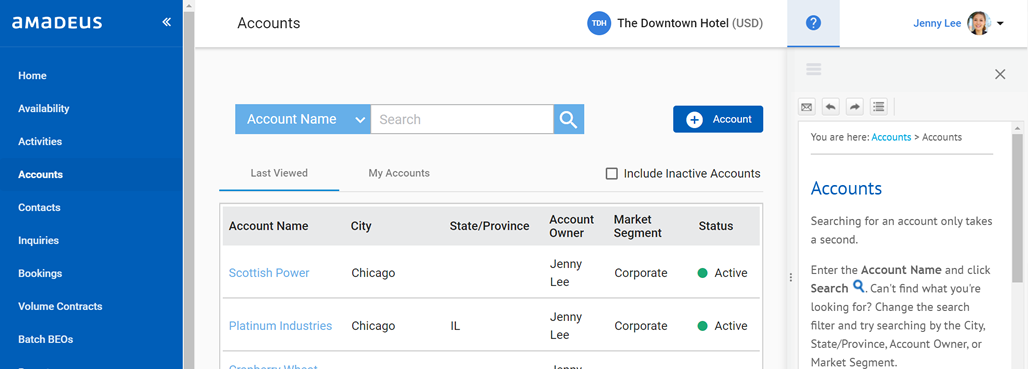
Search for and create an account
On the left sidebar, click Accounts and search for Platinum Industries to see if someone else at your company already created it. If you're working in a multi-property environment, you'll see all accounts and contacts for all properties in the search results—not just accounts who have done business with your specific hotel. If you don't find the account, click + Account to create a new one. For step-by-step instruction, use the inline Training & Help.
Add a contact
On the Account page, click the Contacts tab and see if the person you're working with is listed. If you don't see Anthony Gibbs, click + Contact.

Create a booking and send a contract
On the Contact page, click the Bookings tab, and then click + Booking. The Training & Help will guide you through the steps to detail the booking.
Here's a reminder of the details: Platinum Industries is having a Quarterly Meeting for 20 people. Each person is staying in a king room, with meetings from 8:00 AM to 5:00 PM, breakfast, lunch, and breaks. They're arriving on November 3rd, meetings start on the 4th, departing after the meetings end on the 6th. Make the booking ten years in the future.
On the Booking page, scroll down to enter guestrooms (click + Room Block) and events (click + Event)—starting to see a pattern here?
If this was a real booking you'd want to open the Availability page to ensure you have enough guestrooms and event space.
Last but not least, let's send the contract. At the top of the Booking page, click More..., and then click Print Booking. In the page that opens, select a template, for example, "Contract - Rooms & Events Full". Then click Print and select DOC or PDF. If you typically like to edit the contract before sending, select DOC. This way you can edit the document as needed, save as PDF, and then email it to your customer.
Detail the BEO
Hooray! Anthony signed the contract. If this was a real booking, when you receive the contract you would change the status of the booking to Definite. Then on the Booking page, in the Booking Documents section, attach a copy of the signed contract.
You've sent the catering menus to Anthony so he can start deciding what he wants to order. When he's made his decision, select an event and click + BEO. Search for and add items to the event, such as food, beverage, or audio visual equipment. If you need to write notes to the chef or banquet staff, scroll down to the Comments section. If you want to include two events on the same BEO, such as the meeting and the break, select both events and then click + BEO.
To send the customer their BEOs you have two options.
- To generate one BEO at time, click Print on the BEO page.
- To generate one document that includes multiple BEOs, click Batch BEOs in the left sidebar and then search for your booking by name. In this scenario, this is the easiest way to whip up one PDF file to email to Anthony.
When you're finished practicing in your training booking, make sure you change the status to Turned Down, and select a lost business reason of "Entered in Error" or similar.
So what now?
There are lots of other things you can do, and you'll discover those as you explore. Practice entering a few accounts and contacts to gain confidence and get familiar with navigating the system. Try using the Activities feature to log a few phone calls or enter future tasks. Next, create some bookings. At first it might take some time to create a booking—but you'll be surprised how quickly you catch on.
You've got this!