What's new in Delphi Diagramming 2018 R1?
In this release we’ve added enhancements that simplify and streamline the process of creating room plans. Take a few minutes to learn about each new feature below and review the 2018 R1.0 release notes.
Prior to 2018 R1.0, Delphi Diagramming used a room's maximum capacity to create room plans, which often meant you had to modify each room plan to reflect the number of people actually attending the event. Now Delphi Diagramming does that work for you.
When you enter the event attendance, Delphi Diagramming uses that value to set the appropriate number of seats. This makes it easy to personalize your function space for potential customers and provide your operations team with details they need to successfully execute the event. This feature is available in both Property and Website editions, as well as in Delphi integrations.
For Delphi properties that are integrated with Delphi Diagramming, here are a few things to keep in mind:
- Delphi Diagramming uses the Set attendance to create room plans. If Set isn't entered, Guaranteed is used, and then Agreed.
- After a room plan is created, any changes you make to the event in Delphi are not reflected in Delphi Diagramming and vice versa.
In the following example, we created a Show and Tell Keynote event in Delphi and entered an Agreed attendance of 115 and an Expected attendance of 110. The event should be set up in Theater style in the Manitoba-British Columbia room.
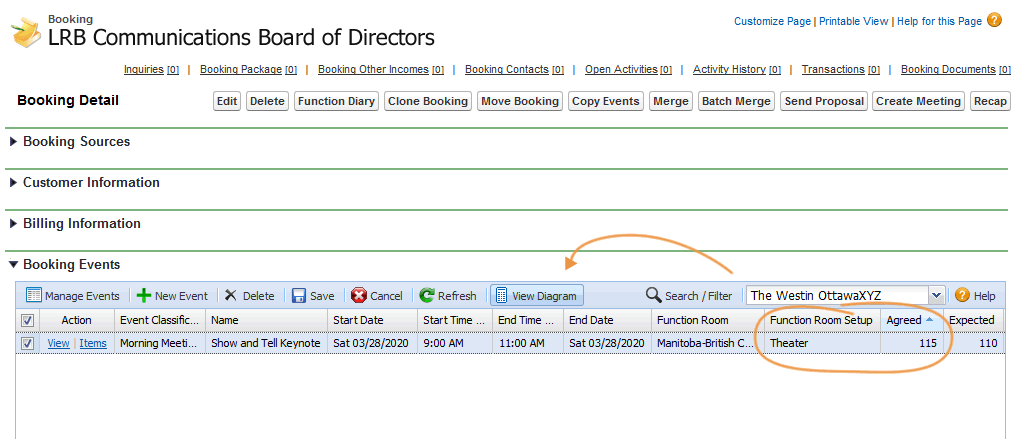
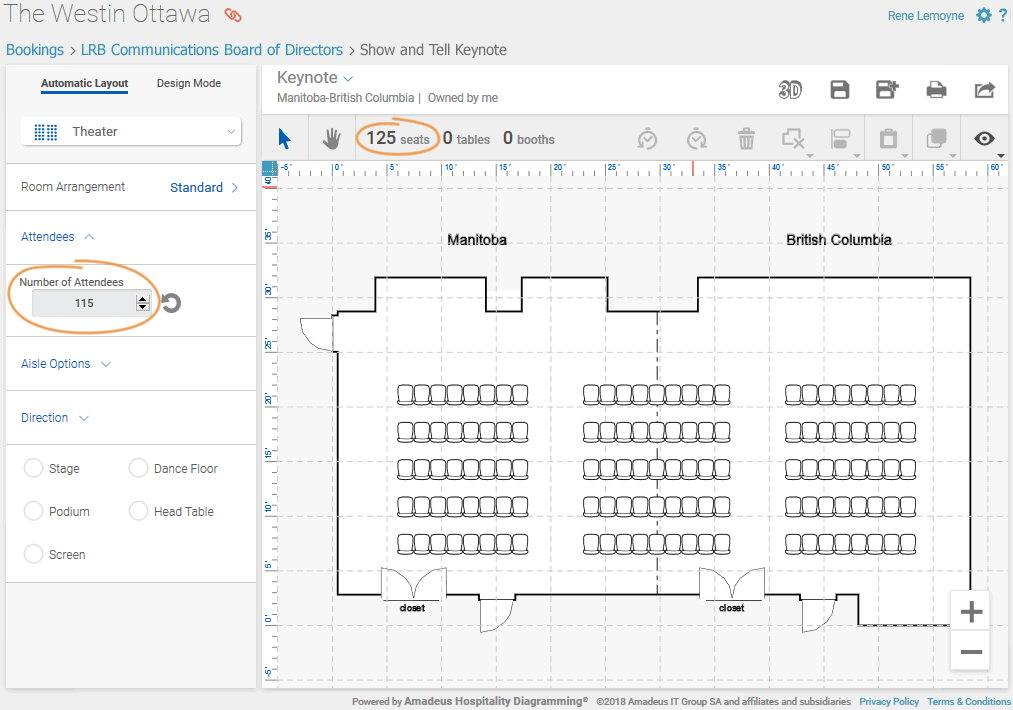
After clicking View Diagram, we see that Delphi Diagramming uses the Agreed (contracted) value to set up the room. This gives us the flexibility to change the Expected value in Delphi for accurate forecasting without affecting the room plan. Because our Agreed attendance of 115 would leave some of the rows half filled, however, Delphi Diagramming automatically adds an additional ten seats to ensure the room is set symmetrically.
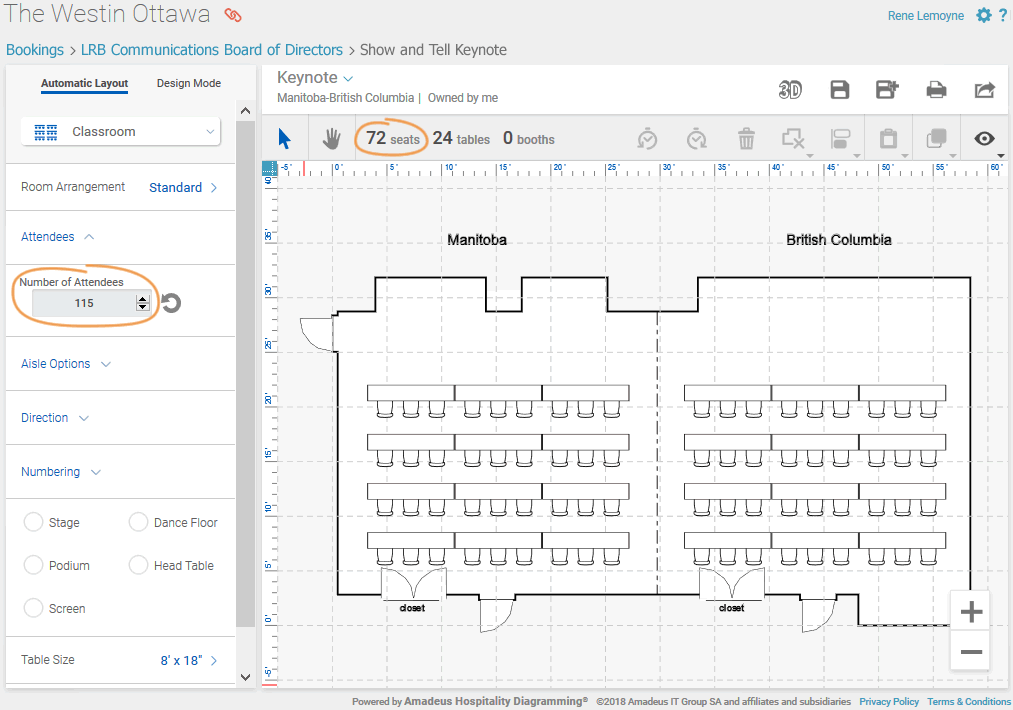
If you change the seating style, Delphi Diagramming continues to use the attendance you entered in the new setup. This is helpful when you need to create multiple room plans for a booking. If the attendance is greater than the room's maximum capacity for the selected seating style, Delphi Diagramming automatically sets the room for the highest number possible. In the following example, the attendance is 115 but only 72 seats have been set.
The Exhibit seating style has been enhanced in both Website and Property editions to make it easier for you to detail those room plans. Before you can take advantage of these enhancements, your Delphi Diagramming administrator needs to enable exhibit booths for the appropriate function rooms. This is done in the new Layout Editor.
Layout Editor
The new Layout Editor lets you select which rooms are available for the Exhibit seating style and configure each room’s defaults.
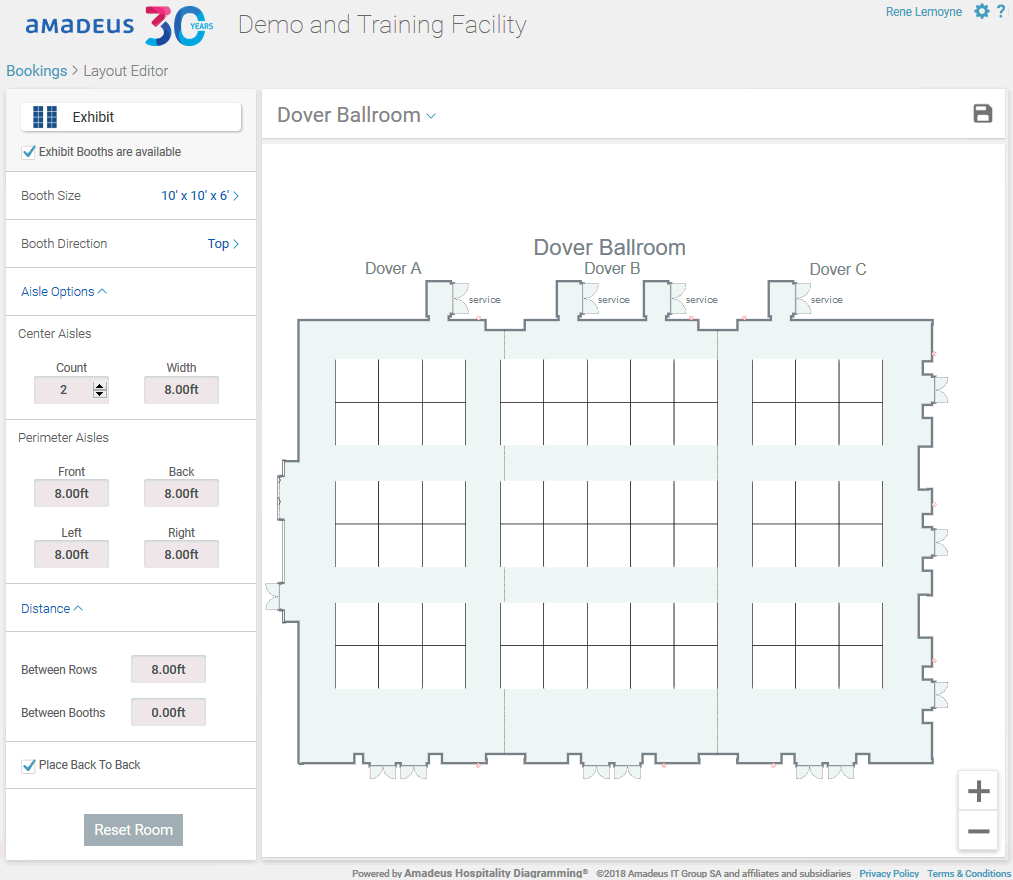
You must be assigned the Layout Editor permission to be able to access this window—this includes the Delphi Diagramming administrator.
Back-to-back exhibit booths
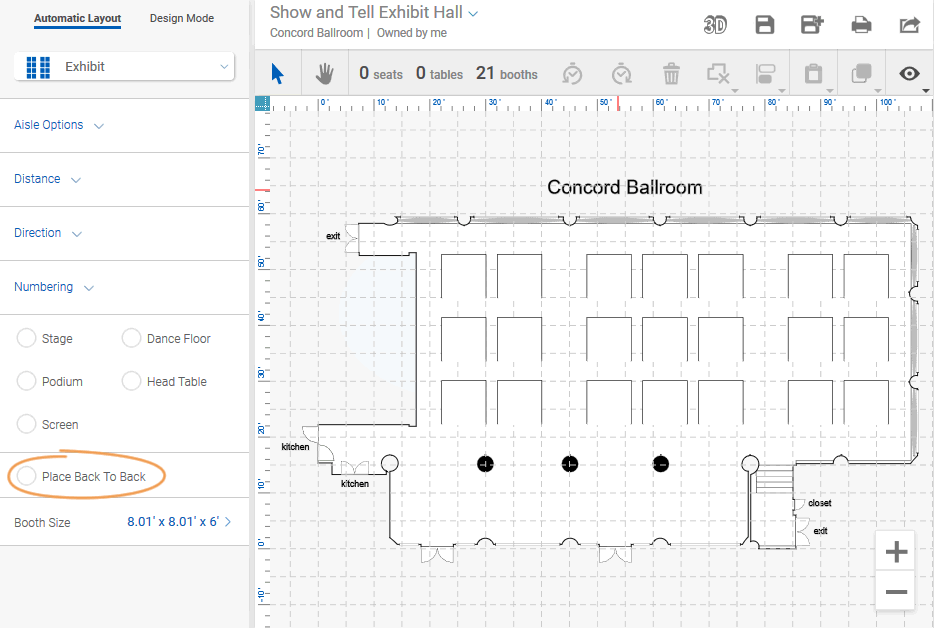
Designing room plans with back-to-back exhibit booths used to be a multi-step process, but with the new Place Back to Back option in Automatic Layout mode, exhibit booths can be set up in no time.
In the image below, exhibit booths are all facing one direction.
Here they are placed back-to-back with just a single click.
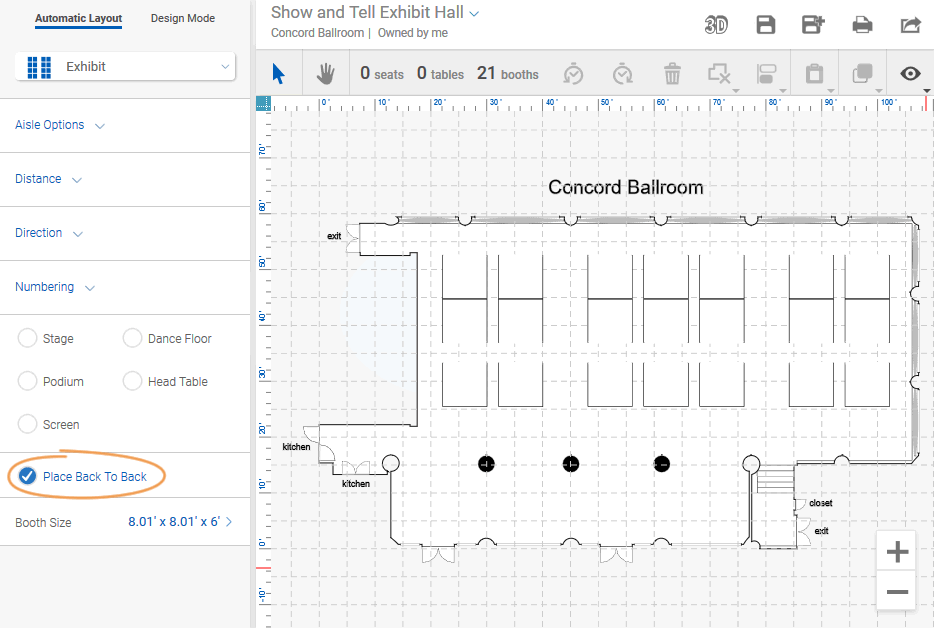
Exhibit booth numbering
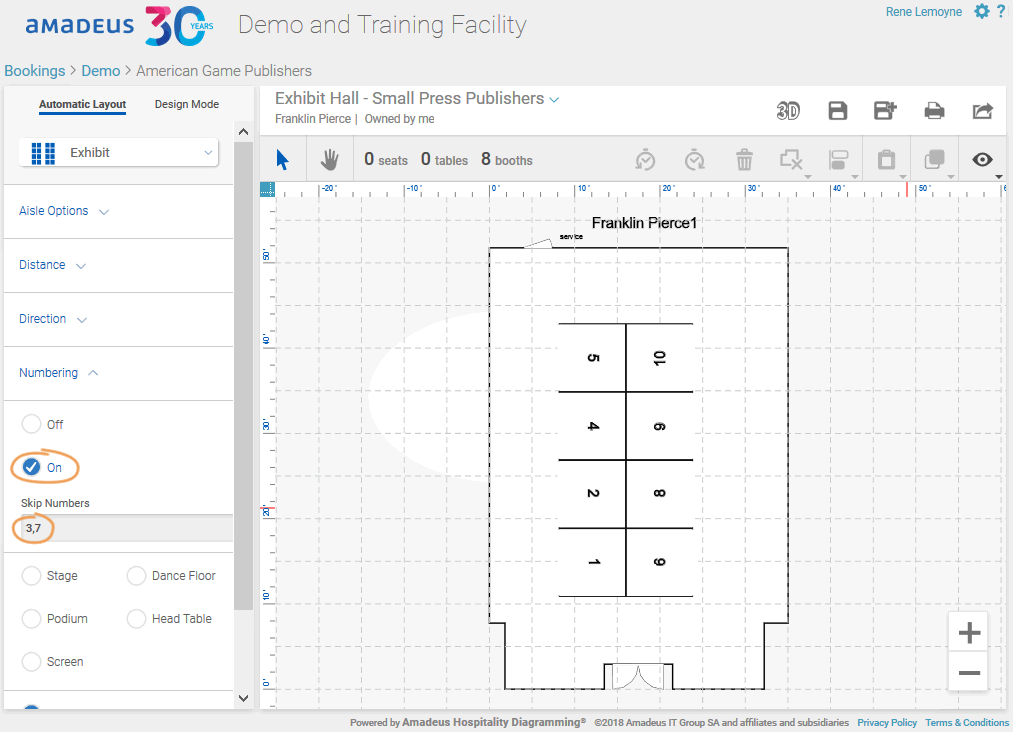
After you’ve set up your exhibit booths, use the new Numbering option to automatically number each booth in the room plan. You can also use this option to specify which numbers you don’t want displayed.
Maximum capacities for exhibit rooms
Use the Capacity Editor to enter maximum capacities for rooms that are configured to allow exhibits. Exhibit capacities are displayed as booths rather than attendees.
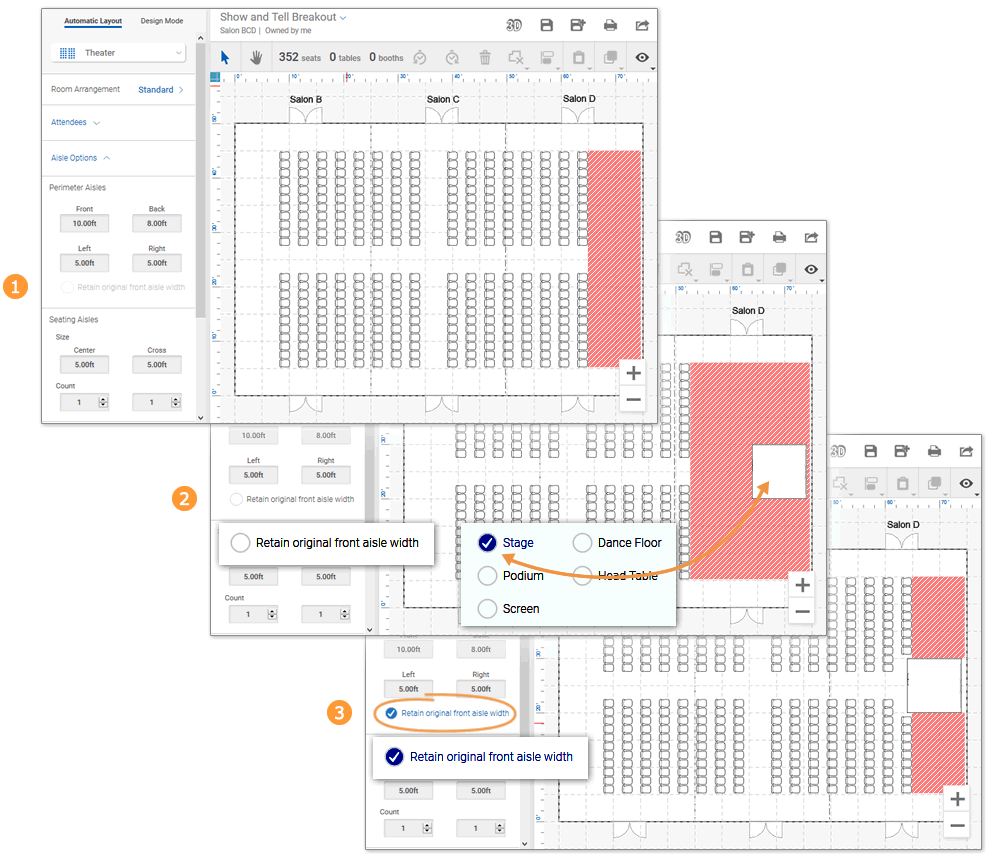
A new Retain Original Front Aisle Width option maintains the original front aisle width regardless of any stage-related objects (Stage, Dance Floor, Podium, Head Table, and/or Screen) that are placed in the room plan. All seating style objects that overlap the staging objects are removed.
The image below illustrates this with a theater seating style and an added stage:
- The Theater setup is set to its maximum capacity with the red area showing the default front aisle width.
- A stage is added to the room plan and the chairs maintain their aisle width in relation to the stage.
- Selecting Retain Original Front Aisle Width uses the front wall for the aisle width and removes overlapping chairs, which increases the room's maximum capacity.
Keyboard shortcuts for grouping and ungrouping selected objects have been updated to SHIFT+G and SHIFT+H, respectively.
| To... | You used to do this... | Now do this... |
| Group Selected Objects | CTRL+G | SHIFT+G |
| Ungroup Selected Objects | CTRL+H | SHIFT+H |