Customize email messages
MeetingBroker has a series of email messages that are automatically generated, such as the New RFP, Updated Proposal, and Escalated RFP notifications. Subscription administrators have access to customize these messages. The templates apply to all locations in the subscription. Avoid using property, corporate, or brand-specific logos/verbiage if they do not apply to all locations.
Modifying the email messages requires knowledge of HTML.
If you have a resource in your organization with HTML skills and you have access to HTML editing software, follow the steps provided. Amadeus Support is unable to assist you with modifying HTML code. If you have issues while modifying the template, click the Delete Subscription Template button to reset it to the default message.
You are not able to preview the HTML messages in MeetingBroker. Any changes you make to the code are immediately applied to new email messages for all users and customers. To ensure code changes are satisfactory, Amadeus highly recommends that you use HTML editing software that allows you to preview your changes. You can then paste the code into MeetingBroker.
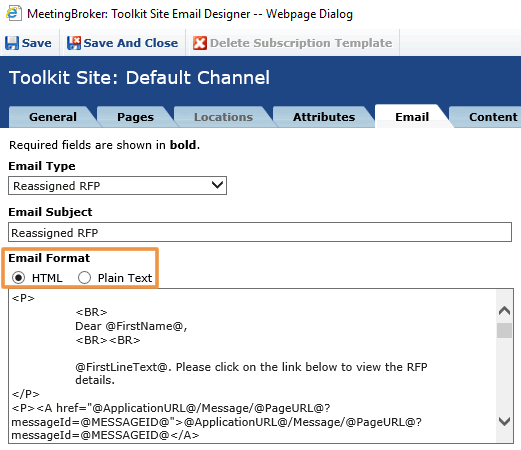
Each email message can be delivered in one of two formats: HTML or plain text. MeetingBroker users have the option in their user profile preferences to select which version of the message they receive. Therefore, both formats must be updated.
Email recipients that are not users of MeetingBroker (for example, planners and customers that are notified when an RFP has been turned down) receive the HTML format.

To customize email messages for your subscription
- From the Subscription Administration Home page, click the Toolkit Sites tab.
- Select the Default Channel.
- Click the Email tab.
- Select the message to modify from the Email Type drop-down list.
- If you want to modify the subject line of the email message, update the Email Subject field.
- Select the format to modify.
You must modify both the HTML and plain text versions to ensure the same message appears for all users.
- For the HTML format, copy and paste the HTML code from your HTML editing software. For the plain text format, modify the text in the window.
- Click Save.
- Repeat steps 6-8 for the other format.
Click Save before changing the format type or your changes will not be saved.
If you want to return to the default MeetingBroker message, click the Delete Subscription Template button.
To include an image in email messages, such as a logo, you must first upload the image file in the Content page of the Toolkit Site.
- From the Subscription Administration Home page, click the Toolkit Sites tab.
- Select the Default Channel.
- Click the Content tab.
- Click the New button to open the Content Item window.
- Click the Browse button and select the image file. You can upload .gif, .jpg, and .png formatted files.
- In the Name field, type a name for the image.
- Click Save.
- The File Name, Type, and Link to File fields will automatically update.
To insert the image into an email template, copy the Link to File path and paste it into the message with the appropriate HTML coding around it (<imgsrc=”https://my.meetingbroker.com/UIToolKit/GetContentItem.aspx?id=326&siteId=41” >).
Learn more...
Overview: MeetingBroker messages
Overview: Subscription administration