What's new in Delphi Diagramming 2022 R1?
Take a few minutes to read about the new features released on February 16, 2022. See the release notes for information including fixed issues.
Property Edition
All Users
Before you share a 3D plan with your customer, you can now insert placeholders to direct them to specific points of view in the room. Highlight the view from the perspective of the speaker, the seated audience, or the camera that will be mounted in the ceiling. Sort the visual points into order and name them to take your customer on a journey through the event. Then, all your client has to do is click through the viewpoints of the room as if you were right there with them, leading the way.

To provide the best experience for your client in 3D render, we recommend adding a few viewpoints in a variety of positions and angles.
-
From your diagram, click Design Mode, and then click the Tools menu.
-
Select the
 Viewpoint Tooland then click the diagram where you want to place it.
 -
Enter the following details:
Name Type a name to describe what the view will show. This displays to the customer when they're viewing the space. Order Enter the sort order that the viewpoints should display in. For example, you may want to begin your customer's journey at the entrance of the room, or show them the bird's eye view from the ceiling first. The viewpoint with the lowest number is what the customer will see as soon as they open the 3D preview. Angle (degrees) To rotate the view to a precise angle, enter the number of degrees between 0 and 359. If you're not sure of the angle you need, leave this field blank. After you click OK, you can re-position and rotate the Viewpoint icon on the canvas just like a resource. Point the larger front of the binoculars in the direction you want them to look. Field of View angle (degrees) The default is 45 degrees. To specify the width of the view, enter the number of degrees between 0 and 90. Using a wide angle will capture more of the peripheral view. Target distance Enter the distance between the viewpoint and the scene you want to capture. For example, if your viewpoint is from the back of the room pointing at a stage, enter the distance between the back of the room to the stage. Current height Select the position of the viewer—Ceiling, Standing, from a Sitting position, or on the Floor. If you want the view to be taken from a different height, select Custom and enter the specific height. For example, if you want the view to show the room layout from the perspective of a seated person, select Sitting. Target height Select the height of what you want the viewer to look at. For example, to show the view for a seated guest looking at the presenter, select Sitting for the Current height, and Standing for the Target height. If the presenter will be on a tall stage, you may need to enter a custom height. -
Click OK. Repeat steps 1-3 to add more viewpoints.
-
Click
 to preview the rendering.
 -
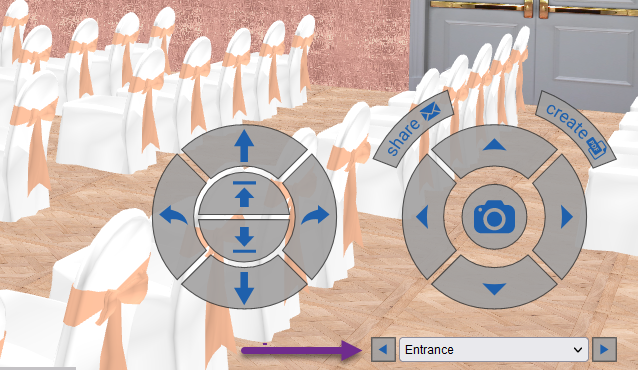
In the bottom right corner, click the arrows to move through the viewpoints, or select one from the drop-down list.
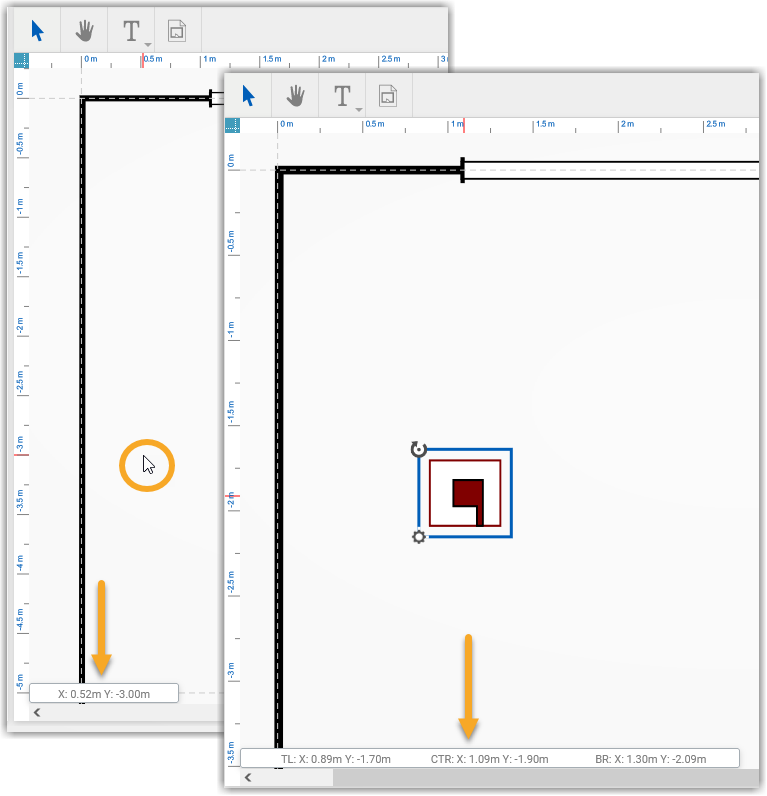
When you move your cursor around the canvas, you'll see the coordinates of your position in the key at the bottom of the screen update in real-time. If it's been a minute since you looked at a graph, X is horizontal, and Y is vertical. When you select and move a resource, these coordinates will update to describe the position of top left (TL), center (CTR), and bottom right (BR) with two decimal places. This makes it easier to make sure the corners of the dance floor are exactly five feet from the wall without eyeballing the ruler.

Exact coordinates of resources show when Live Update is selected in  View.
View.
Administrators
We've been releasing bite-size pieces of functionality that give administrators the ability to add your own meeting space to your property instead of requiring help from Amadeus services. The latest improvement is that you'll now be able to use the 3D functionality in those rooms!
To watch your handmade room come to life, open a diagram and then simply click  View 3D .
If the decor differs in each of your function spaces, you can now configure each of them separately so that your three-dimensional diagrams truly reflect your property. The carpet in the ballroom can finally be the deep gorgeous blue that you want to be able to show off, and your garden lawn can be green all year round. Not only will this please your interior designer, your customers from far and wide will have a better grasp on what their event will look like on the day, saving them time, money, and any unwelcome surprises.
To use this new feature,  click Configure 3D textures when editing a room in the Capacity page. Then select the image you want for that room's wall, floor, ceiling, or view of the outdoors.

Read our tips for uploading new textures.
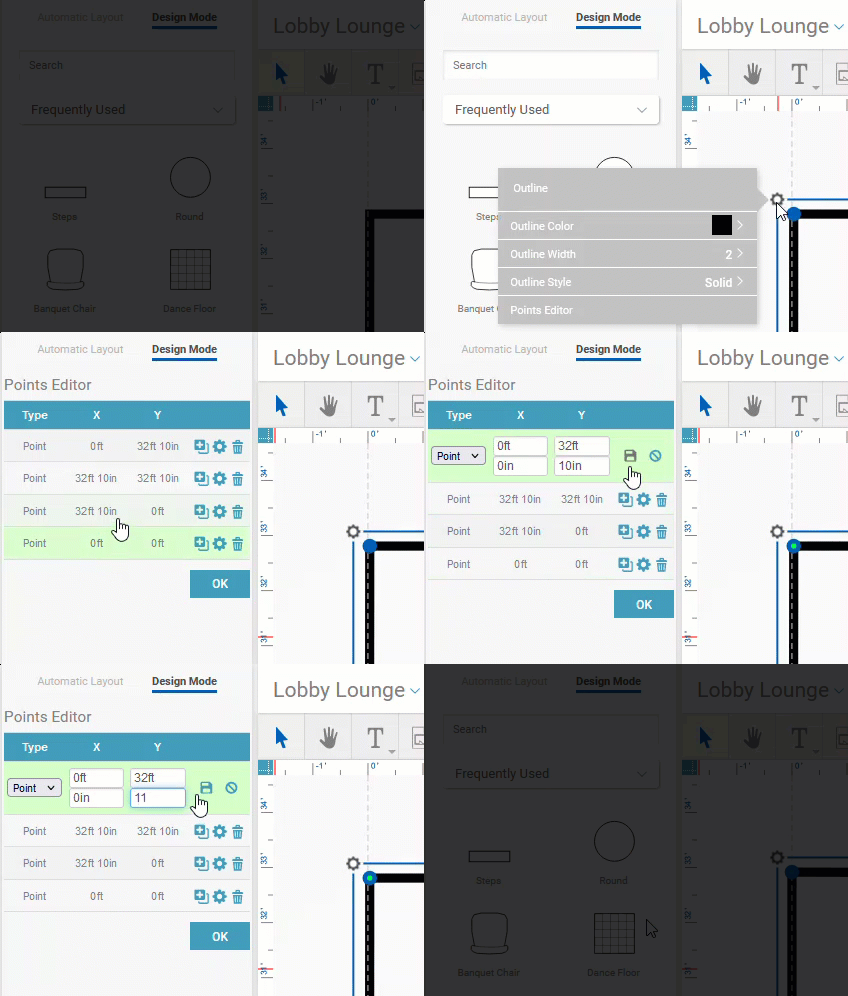
When it comes to diagrams, the only measurement we understand is perfection. We'll help you get there faster with the new points editor. When working with imperial measurements and entering exact coordinates, you can now enter inches rather than having to work out the decimal.
The points editor is available when working with a room outline, seating wizard boundary, multi-lines, and polygon shapes in the Meeting Space Editor.
To edit the position of a point:
-
In the Meeting Space Editor, open a room, click the outline, and then click
 settings .
 -
Select Points Editor and in the list shown, point to a coordinate to see it highlight on the canvas.
-
Click
 Edit and amend the X and Y coordinates as required.

Website Edition
Administrators
Do you find yourself scrolling endlessly through the media gallery looking for a particular file? Now you can filter the media gallery by photos, videos, or virtual tours by clicking the file type that you want to exclude from the gallery. When you point to an image, you'll now see its caption pop-up. Most helpfully, you'll now see a still image of videos and virtual tours, making it much easier to identify the file you want to preview. Lastly, when uploading a new media file, only matching file formats will display.

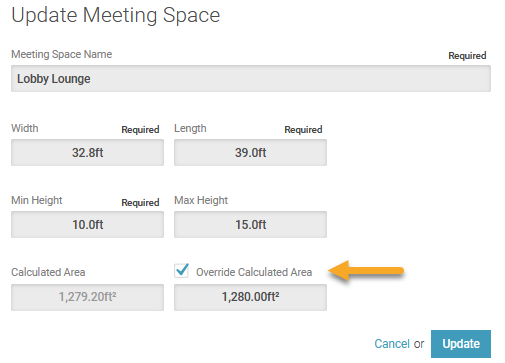
If you advertise a room as 5,000 square feet but it technically adds up to 5,004.75, now you can streamline the capacity chart so it's easier for your customers to read. In the Meeting Space editor, select Override Calculated Area and enter the number you want to display. When creating diagrams, the true area will continue to be used to calculate capacity, but your capacity chart will match your marketing material.

Learn more about the Meeting Space Editor.
If Google maps are restricted in your region, you can now add attractions to the map on your website using Bing Maps. Entice prospective customers by pointing out nearby golf courses, shopping, or airports that showcase why they will love your location. Administrators will find this by clicking Add in the Attractions Editor.
Learn more about identifying area attractions.