Merge document templates
The content of this page is specific to the Delphi product type only. If you are using the Delphi Core product type and want to learn more about the Delphi product type, contact your sales representative.
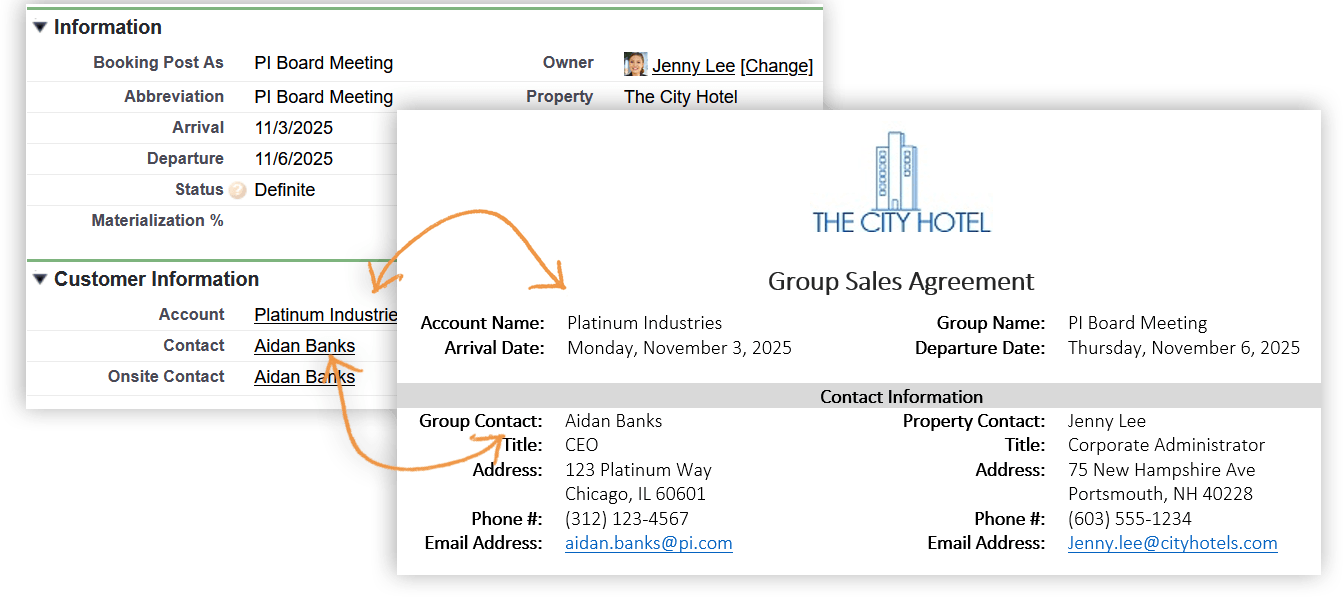
After your team enters a customer's information into an account, contact, or booking, they should never need to type that information again. Instead, when they need proposals, contracts, and BEOs, the relevant information is quickly merged into the document.
This is accomplished with merge document templates. Behind the scenes, a Word document is made into a merge form using merge fields to pull the data from the system into the right place on the document.

Property logo
Your first step is to upload your property logo file on the Property page. The logo will display on proposals, contracts, and other customer facing documents. The maximum size is 1 MB and it must be either a PNG, GIF or JPEG.
Watch this video to learn how to resize your property logo to ensure it's professional and inline with your brand standards.
Default templates
If you created your own property and selected the option to Create Contract and Proposal Templates, you have a default set of document templates and you're well on your way. You'll want to add your contract policies and a few other paragraphs on the Property page, activate the templates you want to use, and then your team can get busy booking business.
Watch this video to learn how to enter custom text such as method of reservation, billing information, cancellation policies, and so forth.
For samples and more information, see Custom text for default merge templates.
Custom templates
If you opted to install your own or you want to make tweaks to the default templates, you have a little more work to do. There are two main tasks to complete for each template:
-
In Microsoft Word, use the Amadeus Merge Tool to edit the document and insert merge fields.
-
Upload the Word file as a Document Template in the system.
Video: Download and log into the Merge Tool with a security token
Installing the Merge Tool adds a special ribbon to Microsoft Word. Administrators must use this tool to create custom merge templates. Watch this video if you do not use MFA (Multi-Factor Authentication) to log in.
Video: Download and log into the Merge Tool with MFA
As you saw in the video, if you use MFA (Multi-Factor Authentication), add the code from the Salesforce Authenticator app.

The app changes your code every 30 seconds. So enter your user name and password, open the Salesforce Authenticator app, wait for the code to change, and then type it immediately following your password with no spaces.
For example, if your password is "myPassword" and your authentication code is "1234567", you'll enter myPassword1234567. Make sure you click Log in before the code changes again.
Video: Create your first merge document
You're logged into the merge tool—now what? Watch this video to learn how to insert merge fields into your Word document. No need to take notes. Visit the Create merge templates topic.
Format date and numeric fields
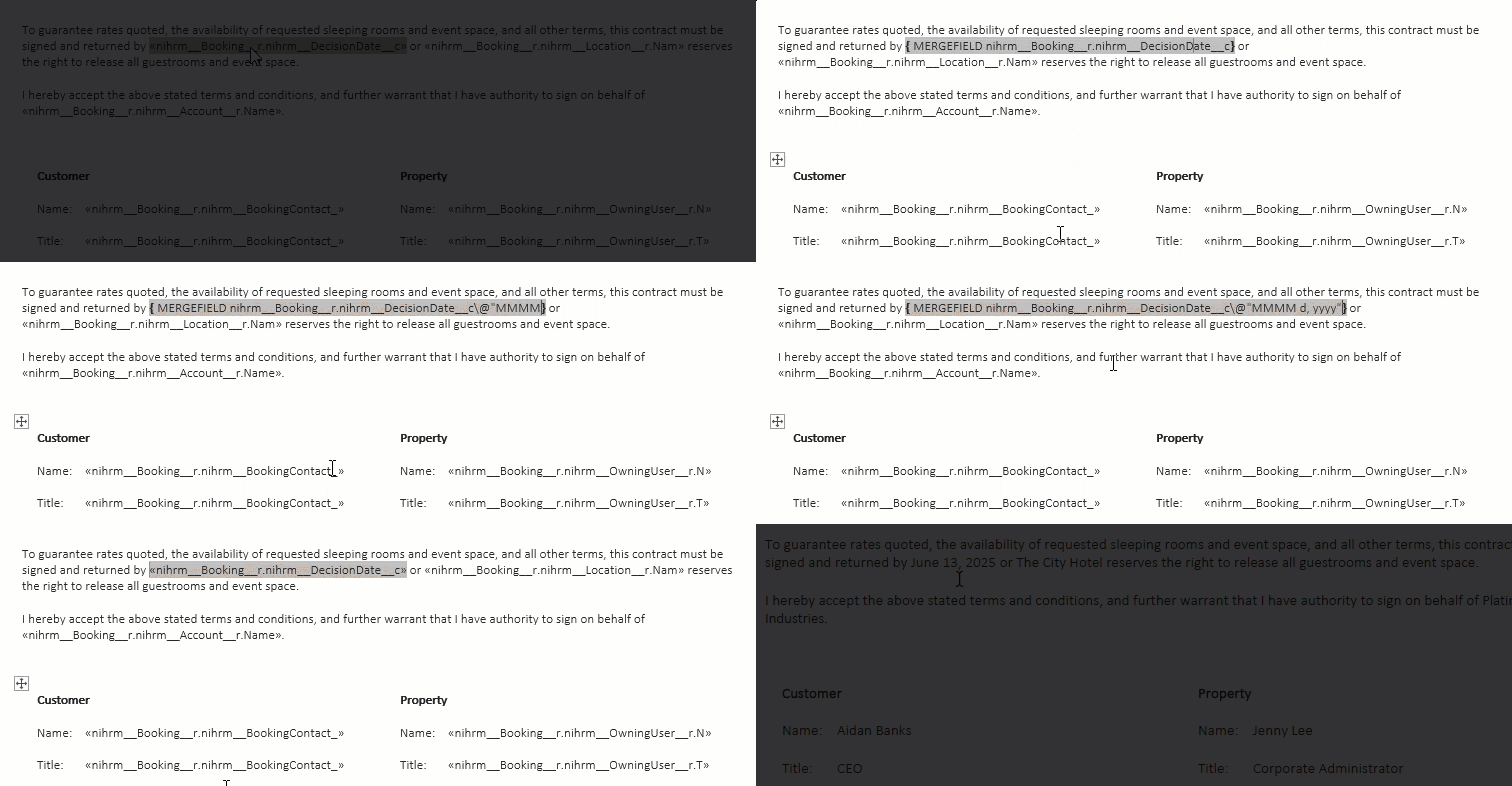
When you view your merged document, you'll see that the default format for dates (2025-01-01) and numbers (1000000) is probably not to your liking. No problem! Adding a little code into the merge tag will adjust the format as desired.
Click on the date field, then right-click and select Toggle Field Codes. Your cursor is exactly where it needs to be (just before the closing French bracket). Now enter the code for your preferred format. Or even easier, copy and paste from the table below. Then right-click and select Update Field.

Example date format strings
In the toggled date merge field, enter \@ and then the date format string enclosed in quotation marks. For example, {MERGEFIELD nihrm__ArrivalDate__c\@ "dddd, MMMM d, yyyy"}. Copy and paste these commonly used strings into your template.
| \@ "dddd, MMMM d, yyyy" | Monday, January 12, 2025 |
| \@ "ddd, M/dd/yy" | Mon, 1/12/25 |
| \@ "dddd, MM/dd/yy" | Monday, 01/12/25 |
| \@ "M/d/yy" | 1/12/25 |
| \@ "MM/dd/yyyy" | 01/12/2025 |
| \@ "MMM. dd, yy" | Jan. 12, 25 |
| \@ "dddd dd MMMM yyyy" | Monday 12 January 2025 |
| \@ "dd/MM/yyyy" | 12/01/2025 |
| \@ "ddd, dd MMMM yyyy" | Mon, 12 January 2025 |
| \@ "yyyy年M月d日" | 2025年1月12日 |
| \@ "dd MMM yy" | 12 Jan 25 |
| \@ "dddd, dd MMM yyyy" | Monday, 12 Jan 2025 |
Example numeric format strings
For numeric fields, toggle, enter \# and then the numeric format string enclosed in quotation marks. For example, {MERGEFIELD nihrm__Rate__c\# "$#,###.00"}.
| \# "$#,###.00" | $195.00 |
| \# "#,###" | 1,300 |
For additional information and tricks like making a field all caps, see Format date and numeric fields.
After entering the codes and updating the field, you can copy and paste it to avoid repeating these steps. So make a Word document on your desktop with one perfect merge field for arrival date, departure date, cutoff date, decision due date, etc. Then copy and paste them into all the templates you make. Just remember when you paste to keep the source formatting. Finally, click the pasted field to make sure it highlights and has retained its merge magic and you're all set.
Quiz time
- What document type must be selected in the merge tool to have packages, terms & conditions, and other income?
- Booking
- Volume Contract
- Advanced Booking
- Package Booking
- All users must download and install the merge tool to use merge documents.
- True
- False
Summary
These are the main skills you need to know to create merge templates. Once you're up and running, if you want to take it to the next level, you can learn more advanced tricks like how to customize your guestroom tables. For now, stay focused on the basics and finish the other new property tasks so your team can get busy.
Next Topic > Taxes and Revenue Classifications
