What's new in Delphi Diagramming 2021 R11?
Take a few minutes to read about the new features released on November 30, 2021. See the release notes for information including fixed issues.
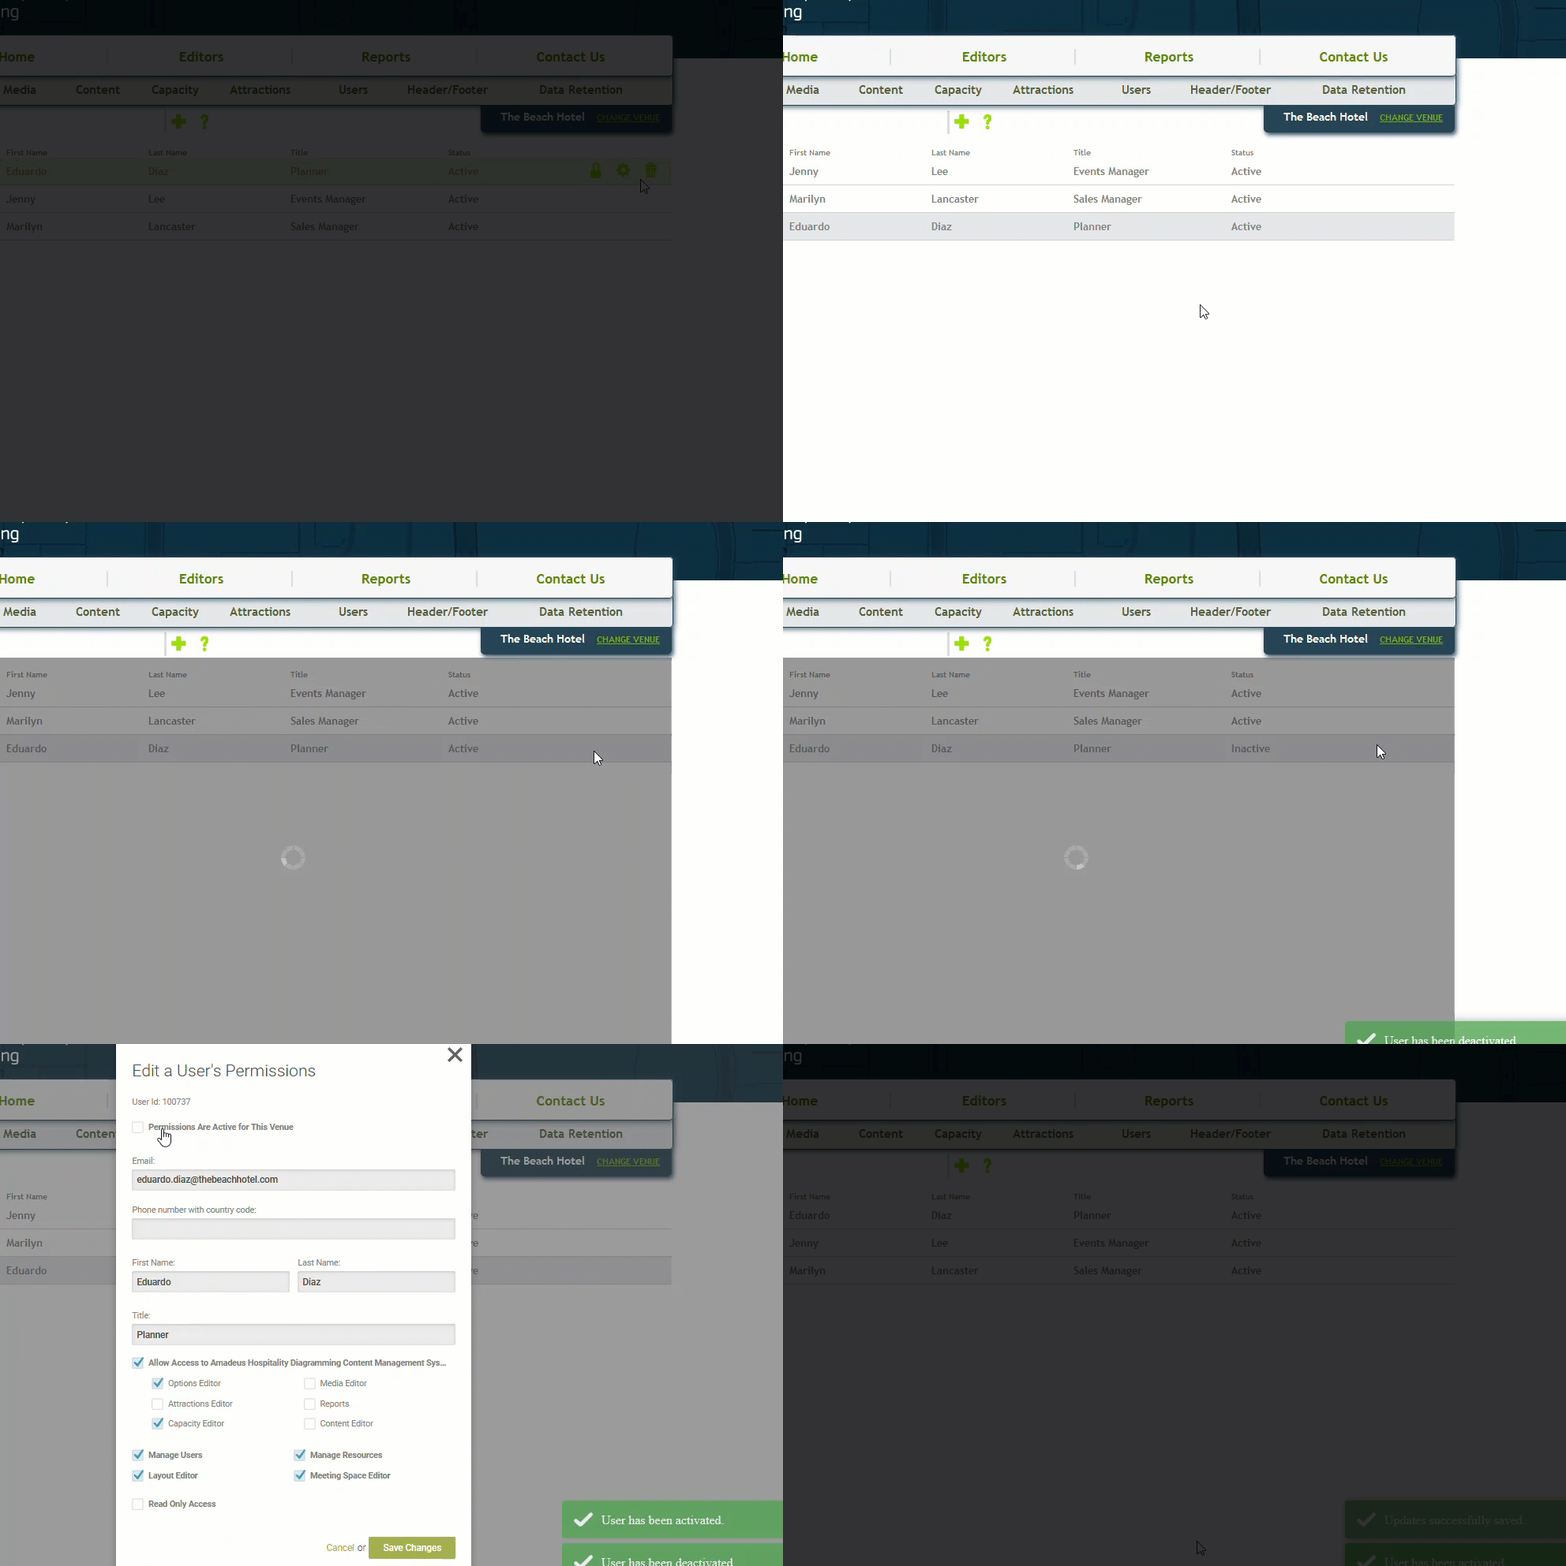
We know that time is of the essence when it comes to staff turnover. As an administrator with user permissions, you can now deactivate or reactivate a user without having to call support! If your team are returning after the pandemic, maternity leave, or Susan just keeps entering the wrong password and locking her account, no problem! Simply click Activate User  on the Manage Users page to reactivate them.
Now that you have superhero powers, here are some tips on how to harness them:
When someone leaves, the first thing you'll want to do is prevent them from logging in.
-
Click Deactivate User Permissions
 to remove access to the property. These users are shaded in gray and drop to the bottom of the list. They won't be able to access your information anymore but will be able to continue working with another property, if they have access to more than one.
 -
If the user has left the company and shouldn't be logging in at all, click Deactivate User
 to remove their access from the system entirely.
 If the user is hopping to another property in your company and will be using the same email address to access Delphi Diagramming, just do step one and deactivate user permissions for your property. Then, once they have been granted access to the new property, they'll be able use their same credentials to login.
If a user has returned to work, or has been locked out, simply reverse the steps above.
-
Click Activate User
 .
. -
Click Edit a User's Permissions
 and make sure Permissions Are Active for This Property is selected.
If the user forgot their password, they can reset it by clicking the Forgot Password? link on the login page.
Learn more about Users.

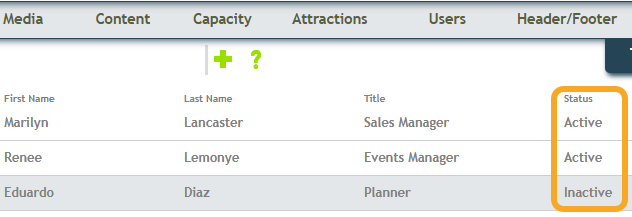
Once upon a time, sustaining user accounts for your team was as clear as mud. It's now plain to see who can or cannot access the system with the new Status column in the Manage Users page. You can then take the appropriate action without having to guess what should be the next step. You'll see statuses of Active, Inactive, or Not Registered which means they haven't yet completed their setup.

Save vintage for fashion and antique for furniture! MP4s are all the rage nowadays, so it's time to clean out those musty old files. Since Adobe Flash player support has ended, .swf and .flv videos will no longer play. If you try to preview an old flash file in the Media Editor, you’ll be reminded to replace it with a modern format. New videos should be supported by HTML: MP4, OGG, or WebM. If the video appears on your area map, you'll also want to update Linked Media in the Content Editor.
To replace unsupported files in the Media Editor:
-
From any property page, click your name in the upper right corner.
-
Select Manage Content.
-
Select the Media tab.
-
Select a video and then click Preview Video to check it's in working order.
-
If it's in an unsupported format, delete it, then click Add Media, Add Videos to upload the new version.
-
Click the new video, add the caption, and click Save.
-
Finally, click the Content tab and link the video to the appropriate locations in the Content Manager.

Learn more about the Media Editor and the Content Editor.
Technology is always changing and we're getting ready to say farewell to Microsoft Internet Explorer. Customers visiting your website will only be able to play videos if they are using one of the modern supported browsers. In parallel, you'll have to do the same to preview videos in the Media Editor. A message will explain why they won't play and suggest using a different browser.
Learn more about System Requirements.
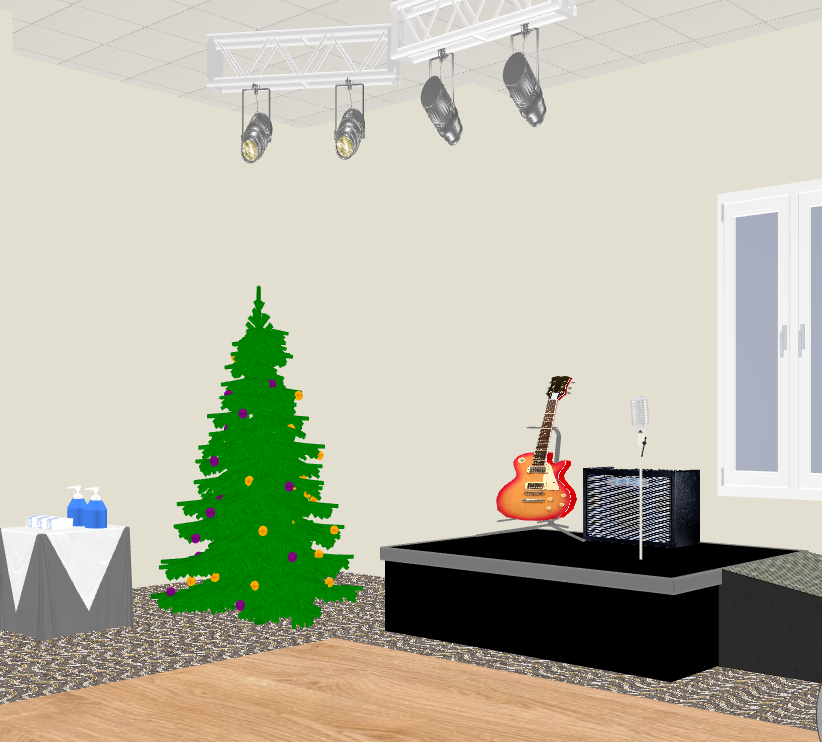
Diagrams really come to life as more 3D models are added for resources. Bring your customers one step closer to reality with fresh, new, and enhanced representations of windows, rotating doors, trusses, dance floors, ramps, risers, face masks, and hand sanitizer bottles. There's even a 3D holiday tree, just in time for the celebrations.

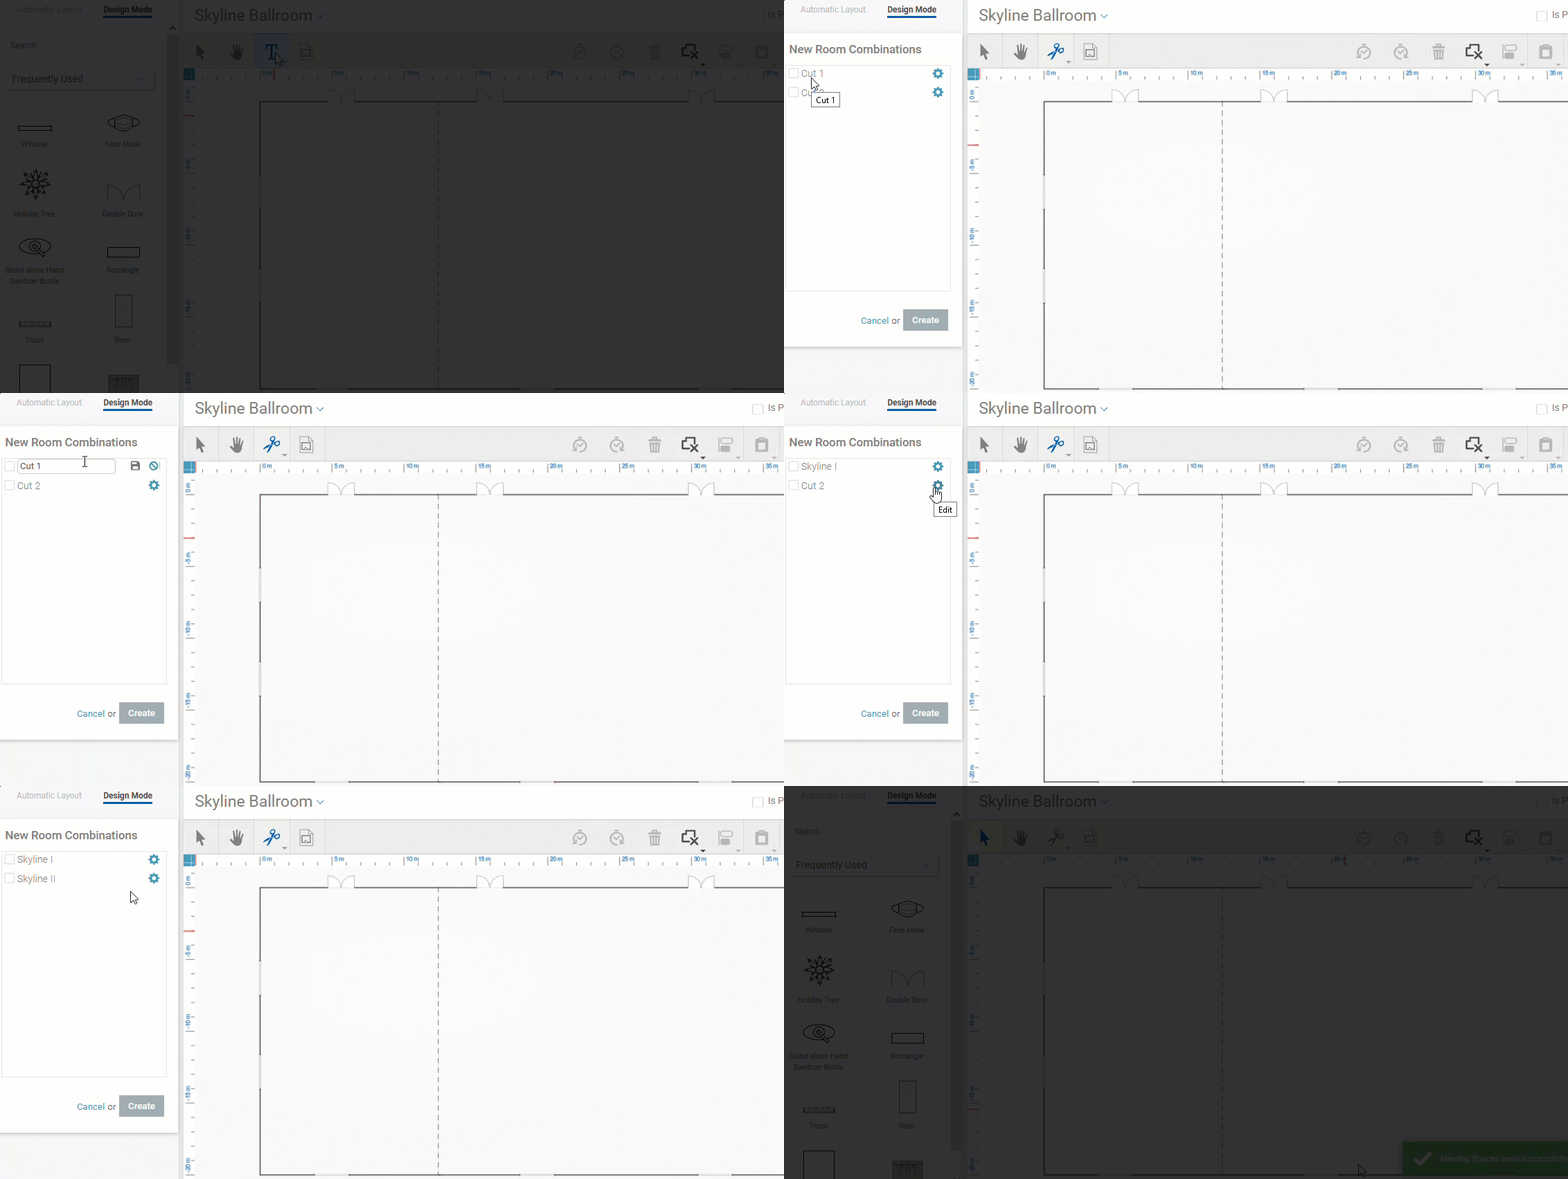
Flexible function space is a unique selling point but it can be a tedious task to create it all. Well, we've just changed that. If you're adding a room in the Meeting Space Editor that can be divided by partitions, first create the combination room. For example, if the Ballroom is made up of Salon A and Salon B, first create the Ballroom. Then, use the new Room Cut Tool  to slice it into the two salons, just like you would cut a pie. We'll automatically show you all possible combinations—click on each one in the list to see the space highlight on the canvas. Click Edit
  to name the sections and Save
  . Then, instead of having to draw another space for the salons, just select the section and click Create. Back in the Meeting Space Editor, expand the arrow next to the name of the combination room to see the components.
