What's new in Delphi Diagramming 2021 R9?
Take a few minutes to read about the new features released on September 30, 2021. See the release notes for information including fixed issues.
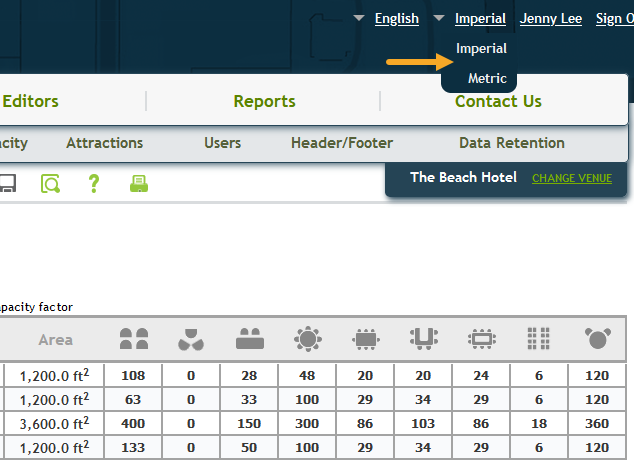
Administrators that have access to the Capacity Editor can now click Metric or Imperial in the upper right corner of the page to switch the unit of measure. The Area column displays in square meters when metric is selected and in square feet when imperial is selected. When you're working with an international customer, you can quickly provide dimensions and even click print  to generate a capacity chart in their preferred format.
Learn more about the Capacity Editor.
Administrators can now hide rooms that are no longer needed. From the Capacity Editor, point to the Room Name, click the pencil  to edit, select Hidden, and then Save.
Hidden rooms no longer display to customers on your website or in picklists when you are creating new diagrams. Existing room plans using the hidden space display in red and will prompt you to change the room if edited.
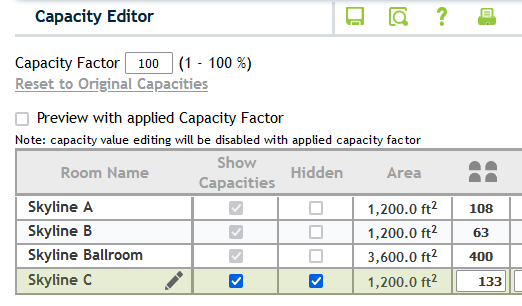
Rooms that are integrated with Delphi must have their mappings removed before they can be hidden. Learn more about managing mappings.
Use the new search field and filters in the Meeting Space Editor to quickly find rooms by name, public status, or owner.

Learn more about the Meeting Space Editor.
From the Bookings page, click Share  to send up to 10 diagrams by email. Add comments, include pictures, document links, and 3D views. Room plans for multiple bookings and even multiple properties can be included within the same email. Recipients will receive a view-only image of the current room plans and additional pictures or links, as selected. The total maximum attachment size limit is 10 MB.
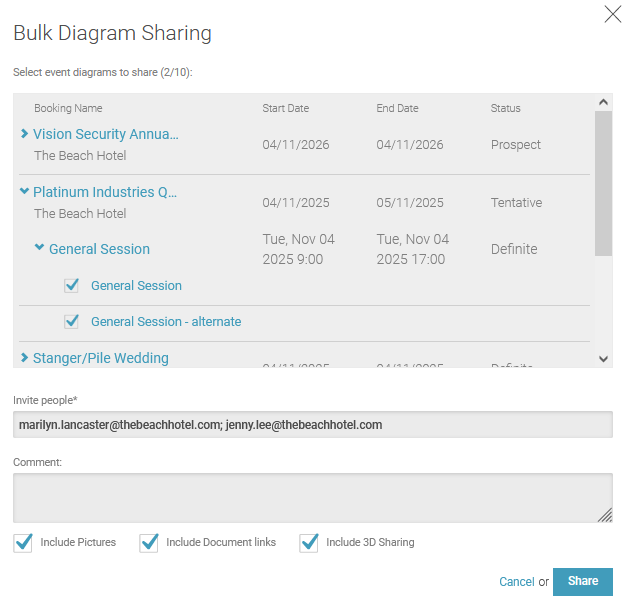
Learn more about how to work with room plans.
Enhance your client communication by including more information in your printed diagrams. When printing, batch printing, or exporting diagrams, the name of the room plan is now included. You can choose to hide or include it by default in the Print and PDF Options section of your profile .
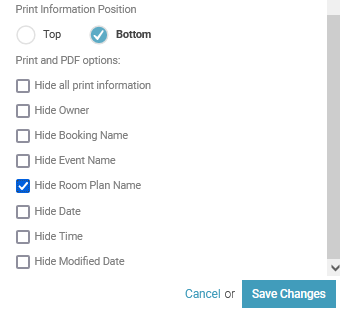
You can also change this in the print dialog of individual room plans, within Show Advanced Options. Only Property Edition has profile print information defaults.
Learn more about the print information options in Edit my profile.
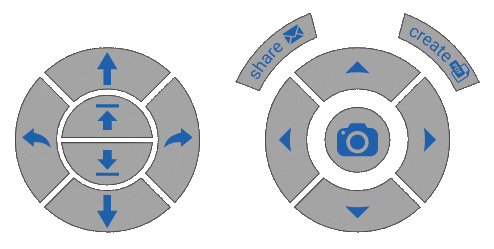
3D viewing just got a lot more exciting! You'll notice a new navigation panel that allows you to rotate from the current viewpoint as if you're turning your head. Use the navigation panel on the right to walk through the room. The new panel to the left allows you to rotate up, down, left and right from a stationary position. Use the small arrows located in the center of the panel to change your elevation—you can float all the way up to the ceiling and capture images of the space from above. For those of you who like to keep it on the keyboard, don't forget we also have keyboard shortcuts for 3D.
Learn more about 3D mode in Design room plans.
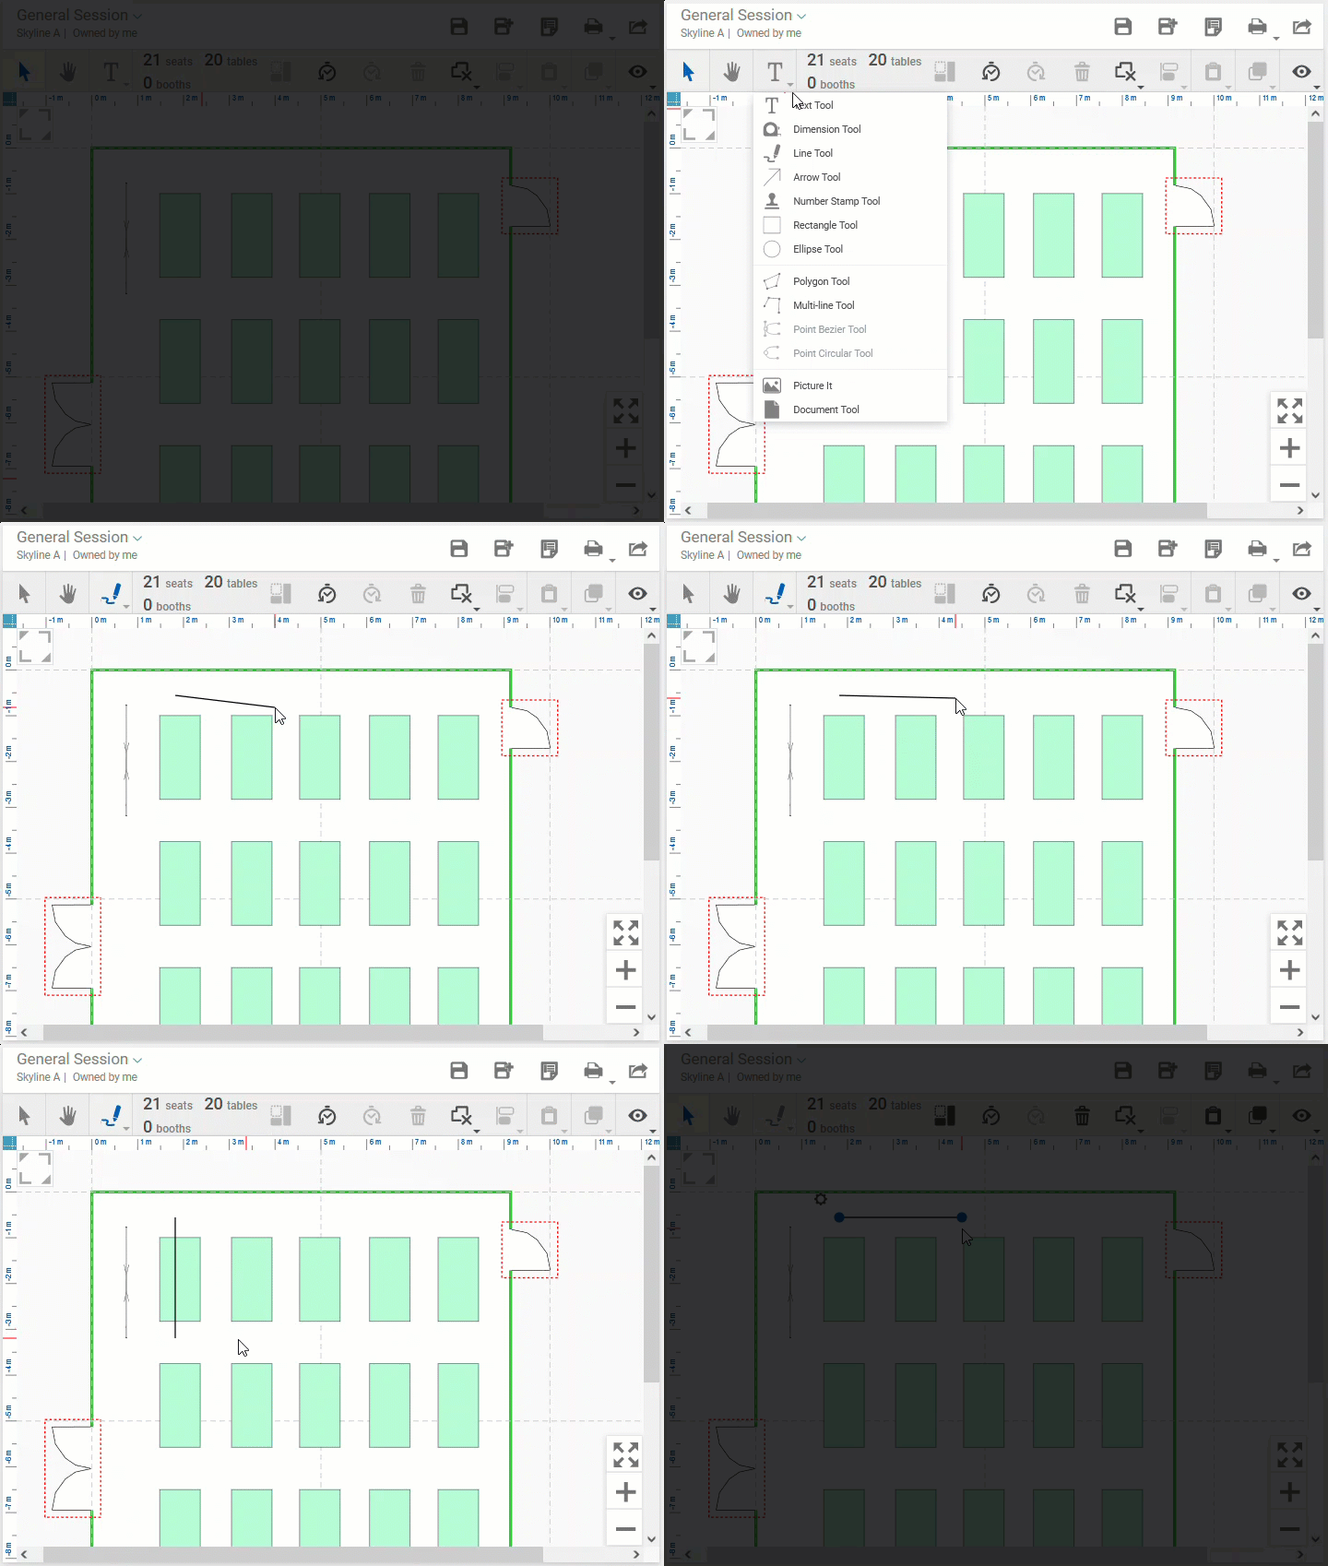
When using the Line, Arrow, Polygon, Multi-line, Air Wall, Extra Wall, and Dimension Line tools, you can snap to walls and other drawn objects. Keep your lines straight and limit rotations to 45 degree angles by holding the SHIFT key as you draw.
In the repeating demo below, while drawing at first without the SHIFT key, you can rotate the line in any direction. When holding the SHIFT key, you can see it snaps to perfect 45 degree angles from the starting point.
Learn more about the Design Tools.
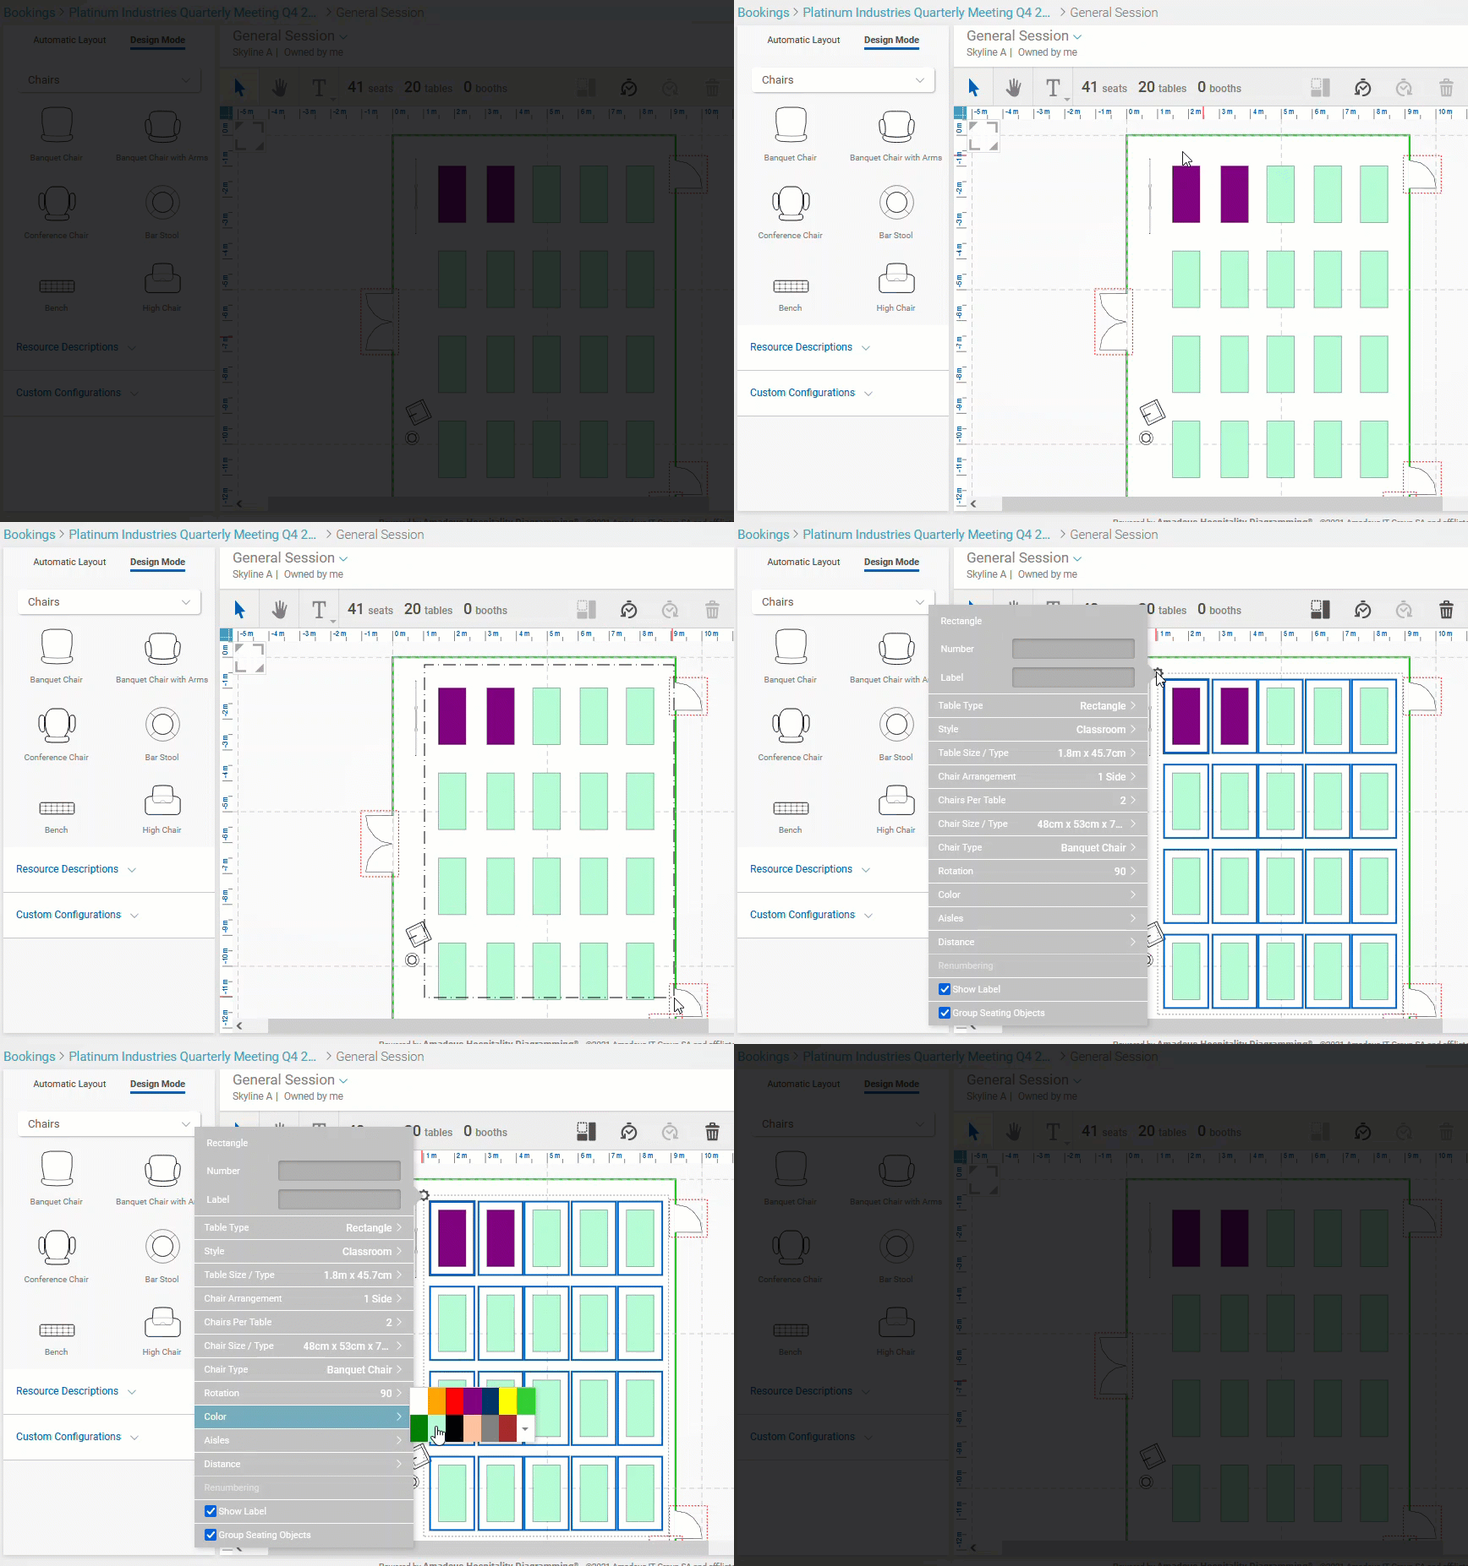
When working on a room plan in Design Mode, you can now select multiple objects of the same type and edit their properties even if they have different values.
Learn more about working with resources in Design Mode.
When viewing the Area Map in Website Edition, if Google maps are restricted, you will automatically be redirected to Bing maps.