What's new in Delphi Diagramming 2022 R2?
Take a few minutes to read about the new features released on May 17, 2022. See the release notes for information including fixed issues.
Property Edition
All Users
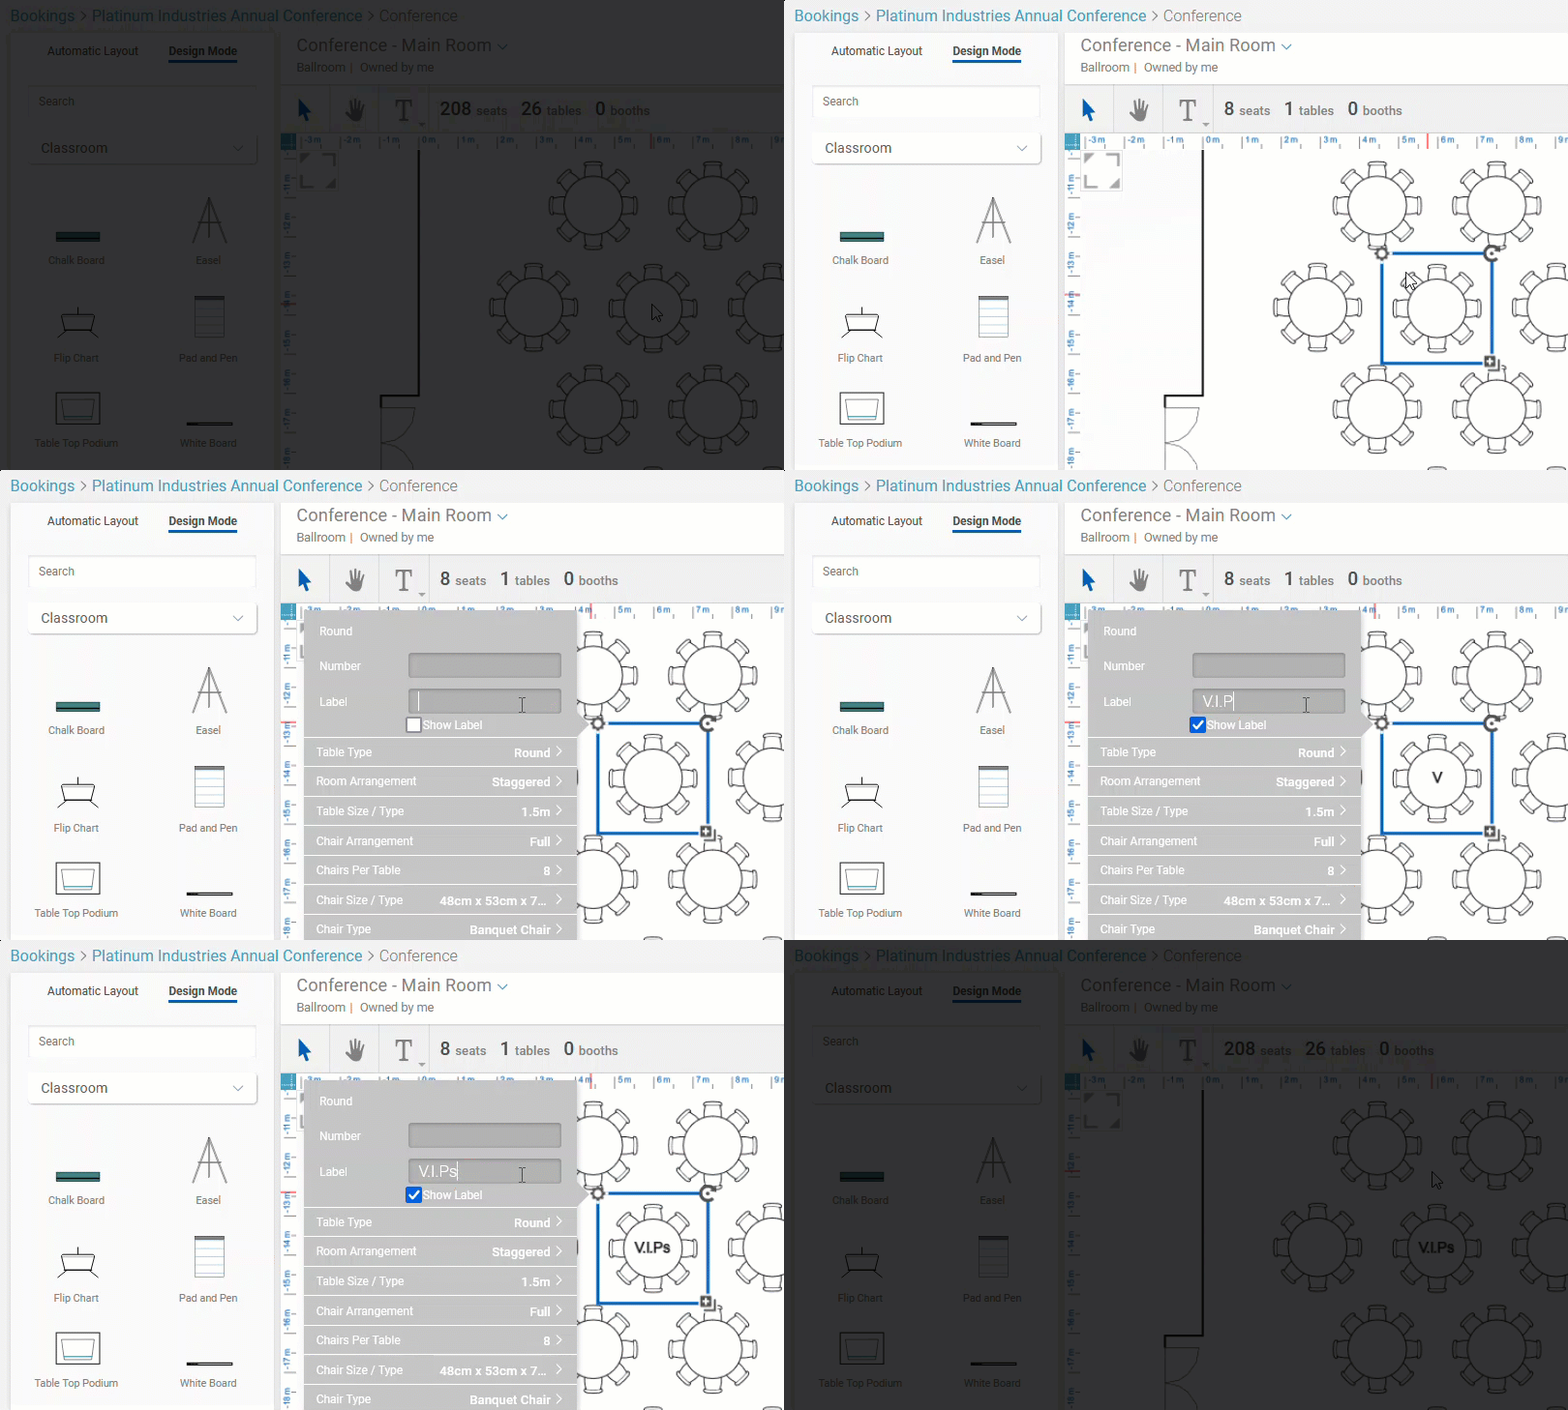
We love to make the system more responsive to you. When you add a text label within resource Settings  , we'll now automatically select Show Label for you, so you don't have to remember. If you prefer to hide it, simply clear the check box.
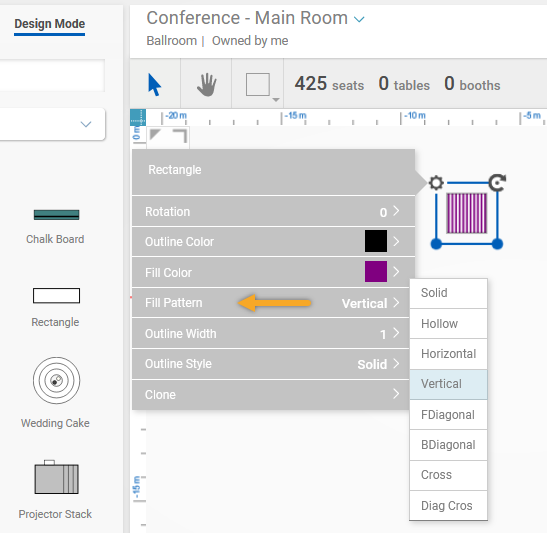
While pointing out important seats and tables by adding a pop of color, you can jazz them up further by adding a pattern. Use a solid block of color as you always have, then add white stripes, checks, or criss-cross. With an abundance of possible combinations, you'll make your communication crystal clear between your team and, most importantly, your customer.
To add pattern in Design Mode:
-
Click the Pointer Tool
 and then click a resource or enclosed shape. For example, a rented photo booth drawn using the Polygon, Rectangle, or Ellipse Tool.
 -
Click settings
 , click Fill Color, and select a color.
 -
Click Fill Pattern and then select a pattern.
Administrators can add colors and patterns to resources as default. Learn more about managing resources.
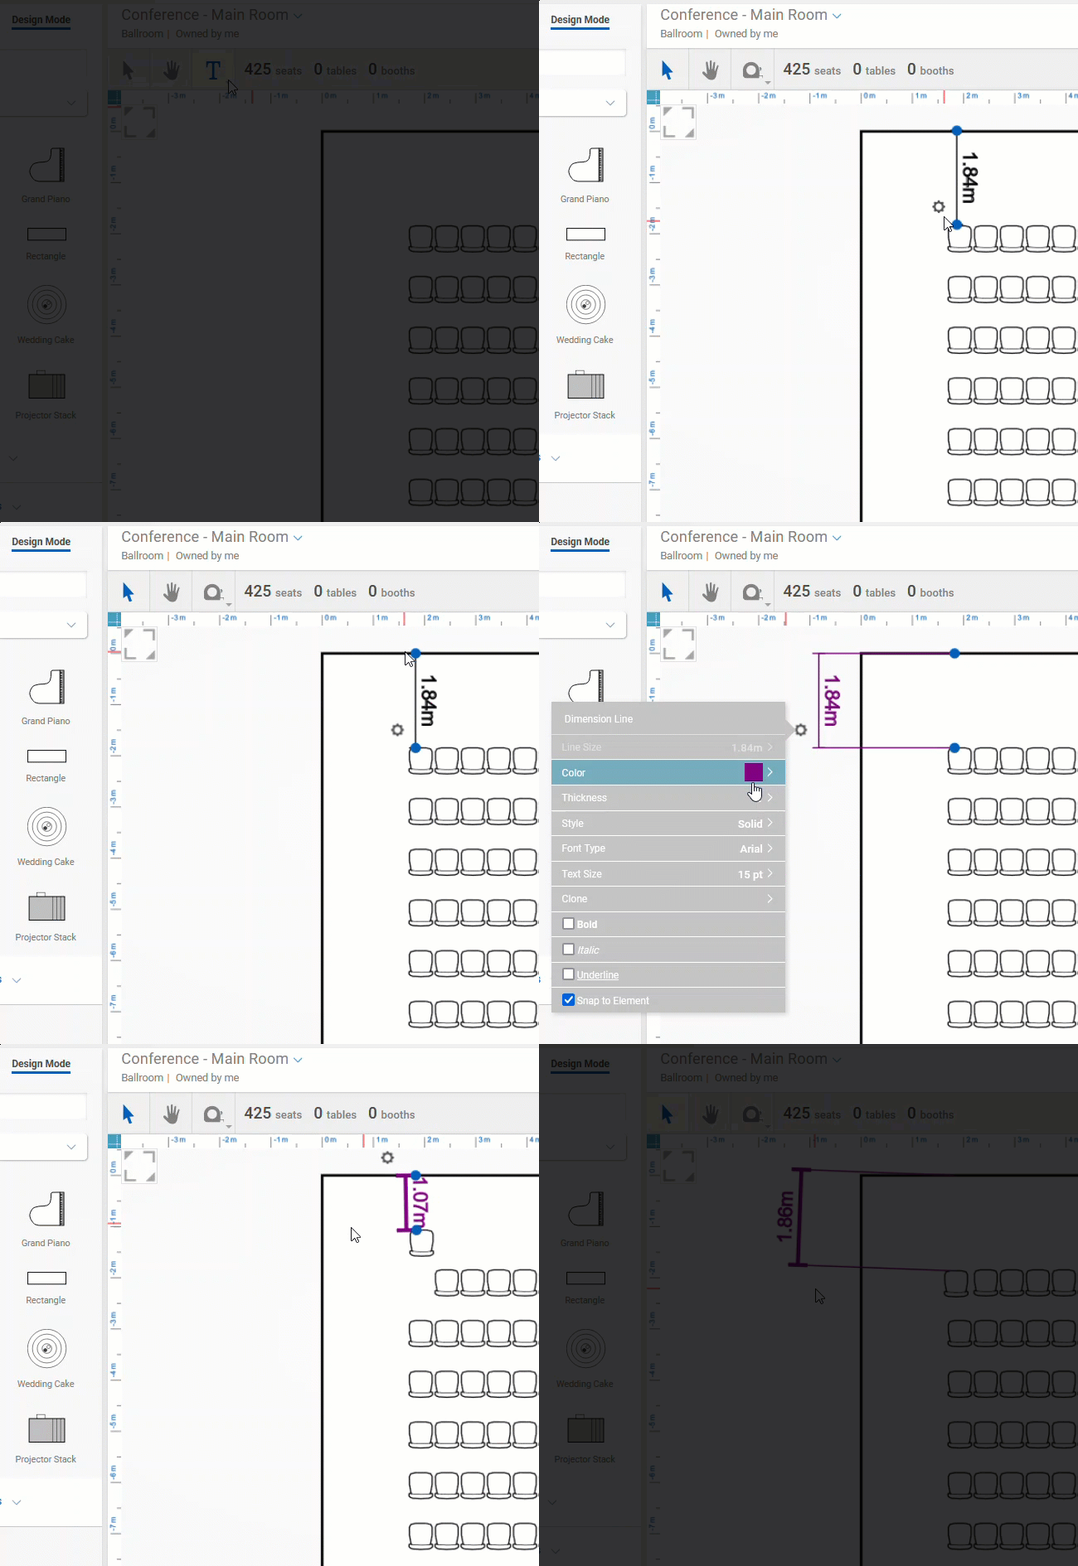
Sometimes you need to explain every little measurement and your diagram can start to look pretty full. You now have the option to move some of the clutter to the side so that it doesn't distract from the main content.
-
In Design Mode, click Tools and select the Dimension Tool
 .
. -
Click the first point, drag to the second point and release.
-
Click the Settings menu of the dimension line
 and select Snap to Element.
 -
Click and drag the line to where you want the measurement to display.
Learn more about designing room plans.
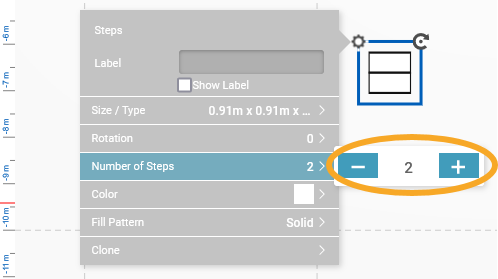
Represent the number of steps when adding stairs to your diagram so that your customer can see if it's one step or three to get their equipment up to the stage. After you add steps to the diagram, click settings and use the new Number of Steps option. The size of the resource will determine the maximum number of steps you can add.
Administrators
Locating a user within a long list can be like trying to find a needle in a haystack. From today, you can stop scrolling through the ghosts of Christmas past and present. Instead, type the name, email address, or job title you're trying to find in the new search bar. We guarantee this will save you time managing staff turnover.
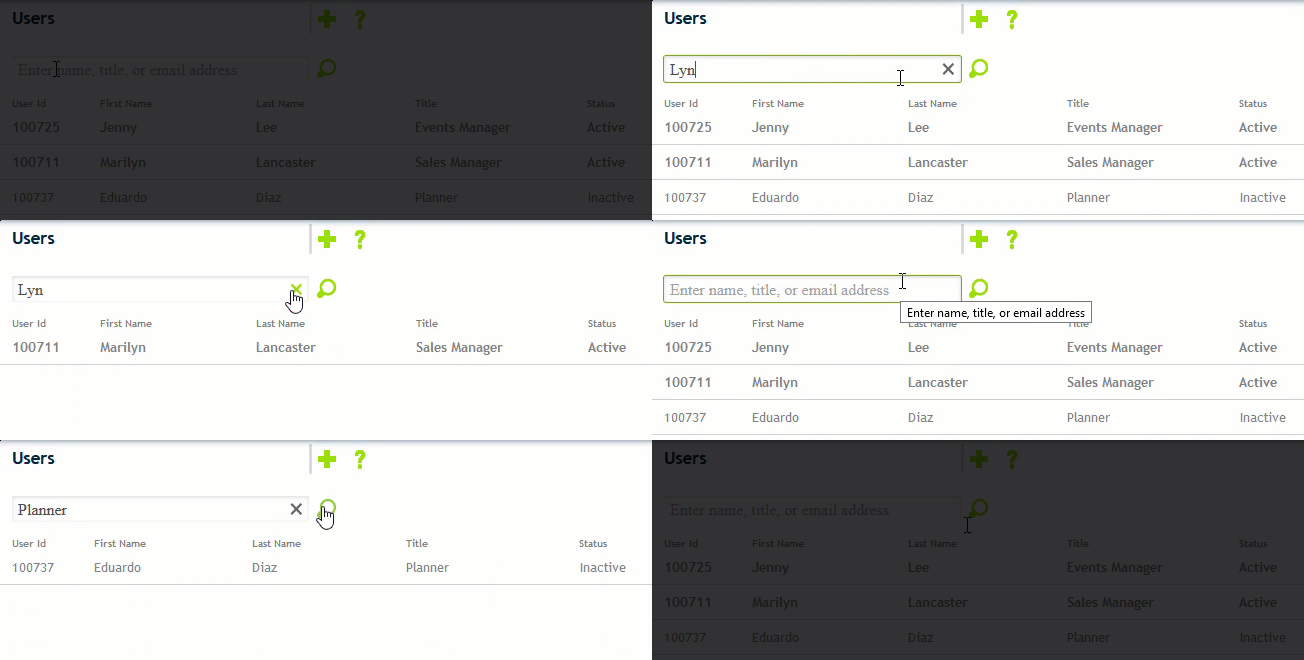
Learn more about managing users.
If you're wondering who changed the capacity of the ballroom or deactivated a user, now you just need to click Show History  to find out.
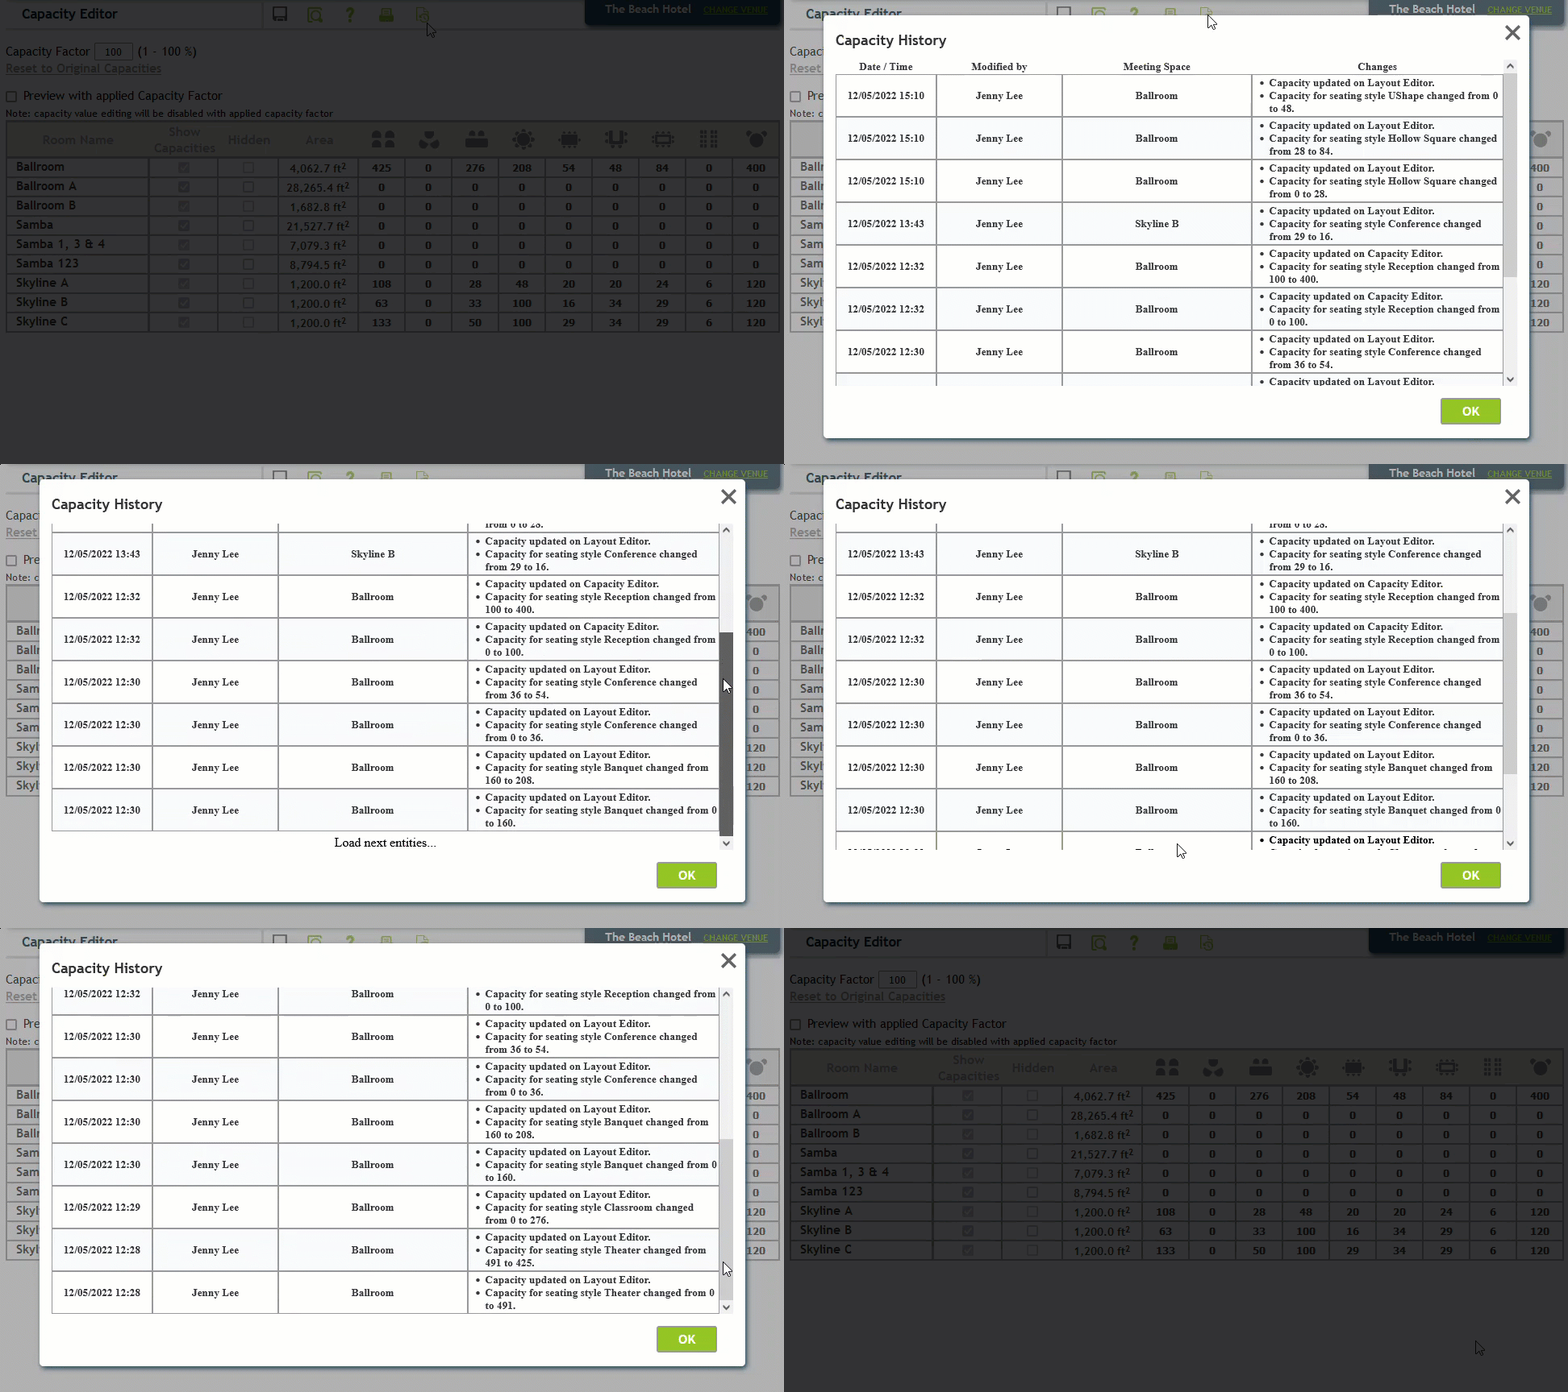
Learn more about managing users, setting default layouts and capacities.
It's all in the details! Customers ask about telephone lines, data connections, and electrical points to plug in their laptops more often than the weather. Why not add the technical details of each floor box to your meeting spaces? Then, when drawing a diagram your team can see the terminals and services supplied to the room. Not only will this improve communication with your customers, but your team will also be able to better plan key elements.
First, an administrator adds the custom floorbox in the Meeting Space Editor, and then everyone can double-click the outlet when detailing a diagram in that room to see the details.
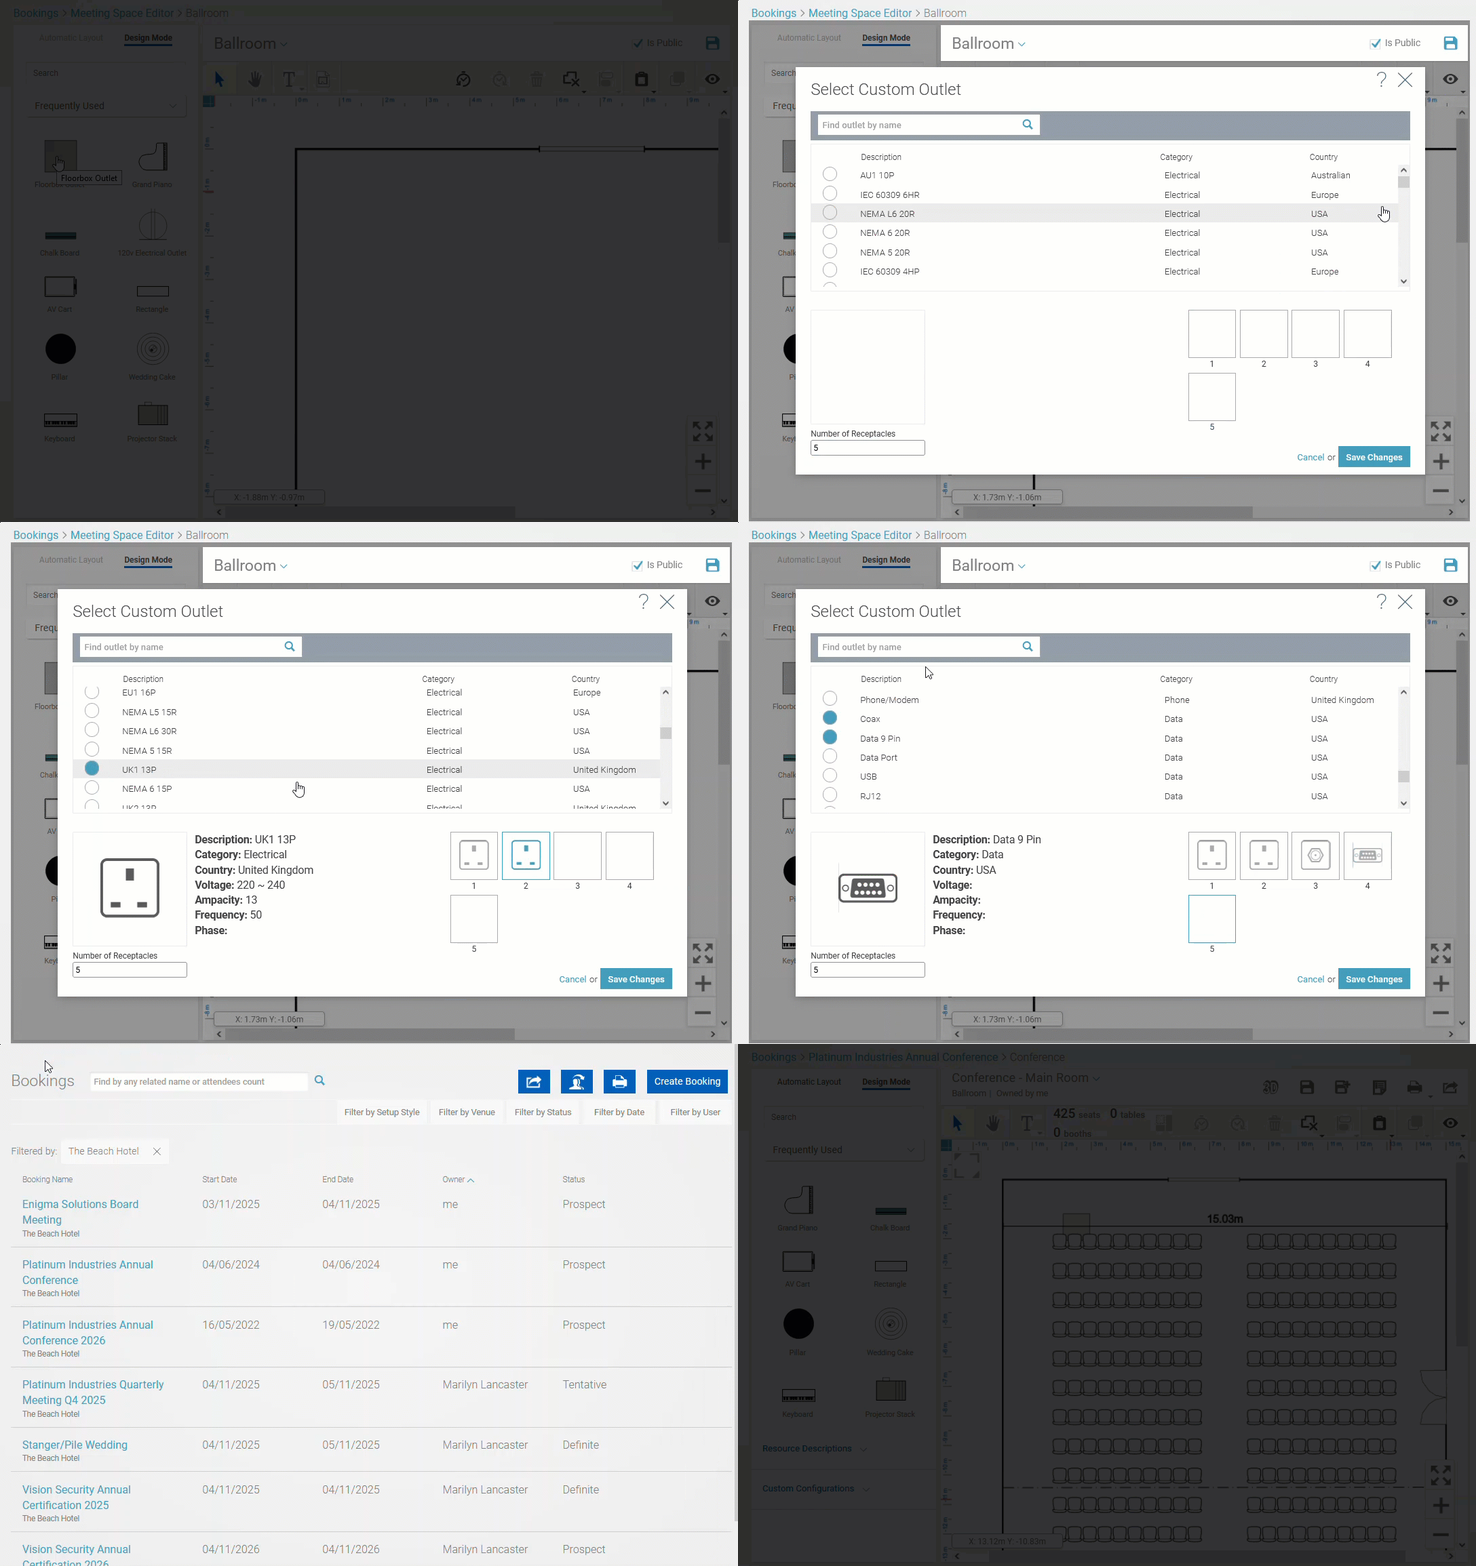
Learn more about adding custom outlets.
Administrators use the Layout Editor to provide the automatic design for each setup style in the meeting space. In addition to enabling automatic layout for your users, this is a great way to double-check that your published maximum capacities actually fit nicely into the space. We've made that even easier by displaying the number of seats, tables, and booths at the top of the page, and they update as you're making changes. If you think an aisle should be wider or you got new banquet chairs that are an inch bigger than the last ones, you can update those settings and see the immediate impact on the capacity before you click Save.
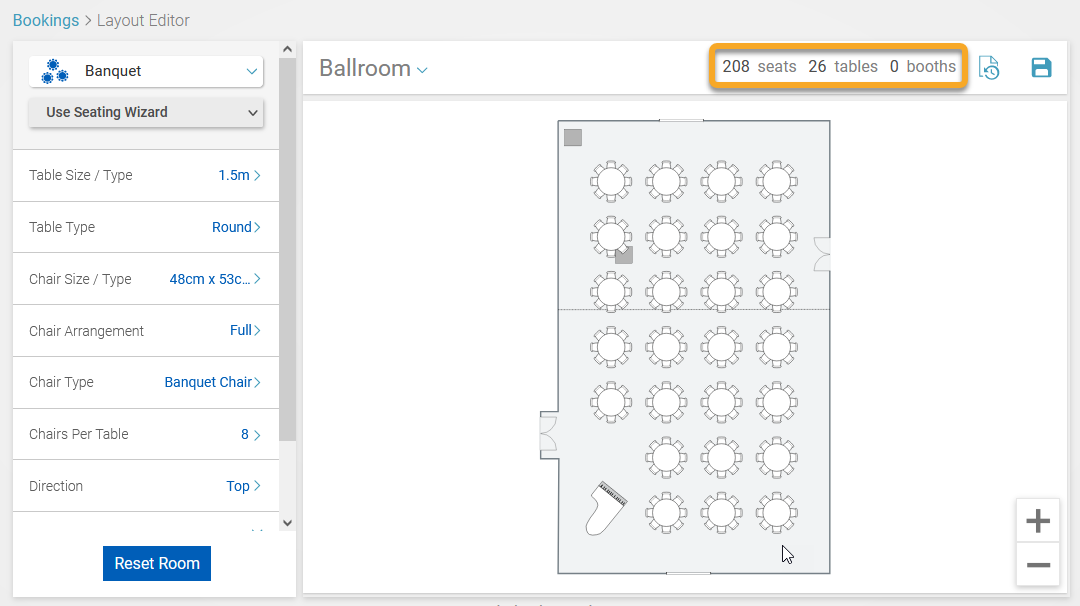
Learn more about the Layout Editor.
The improved room cut tool makes creating your own meeting spaces easy-breezy. Let's say your ballroom divides into 39 possible combinations. Previously, you had to scroll through this long list to find a particular section or combo. Now, all you have to do is press CTRL on your keyboard and click the segments on the canvas! Select more than one section to locate a combo. By default, resources and text within the space are included in the selection. Let go of your CTRL key and click to remove them if they are not required. The New Room Combinations list shows your choices shaded in gray. Then select, rename, and create your spaces.
After creating cuts, any air walls that cross too far over the boundary of the room are automatically cut to meet the walls after you click Create.
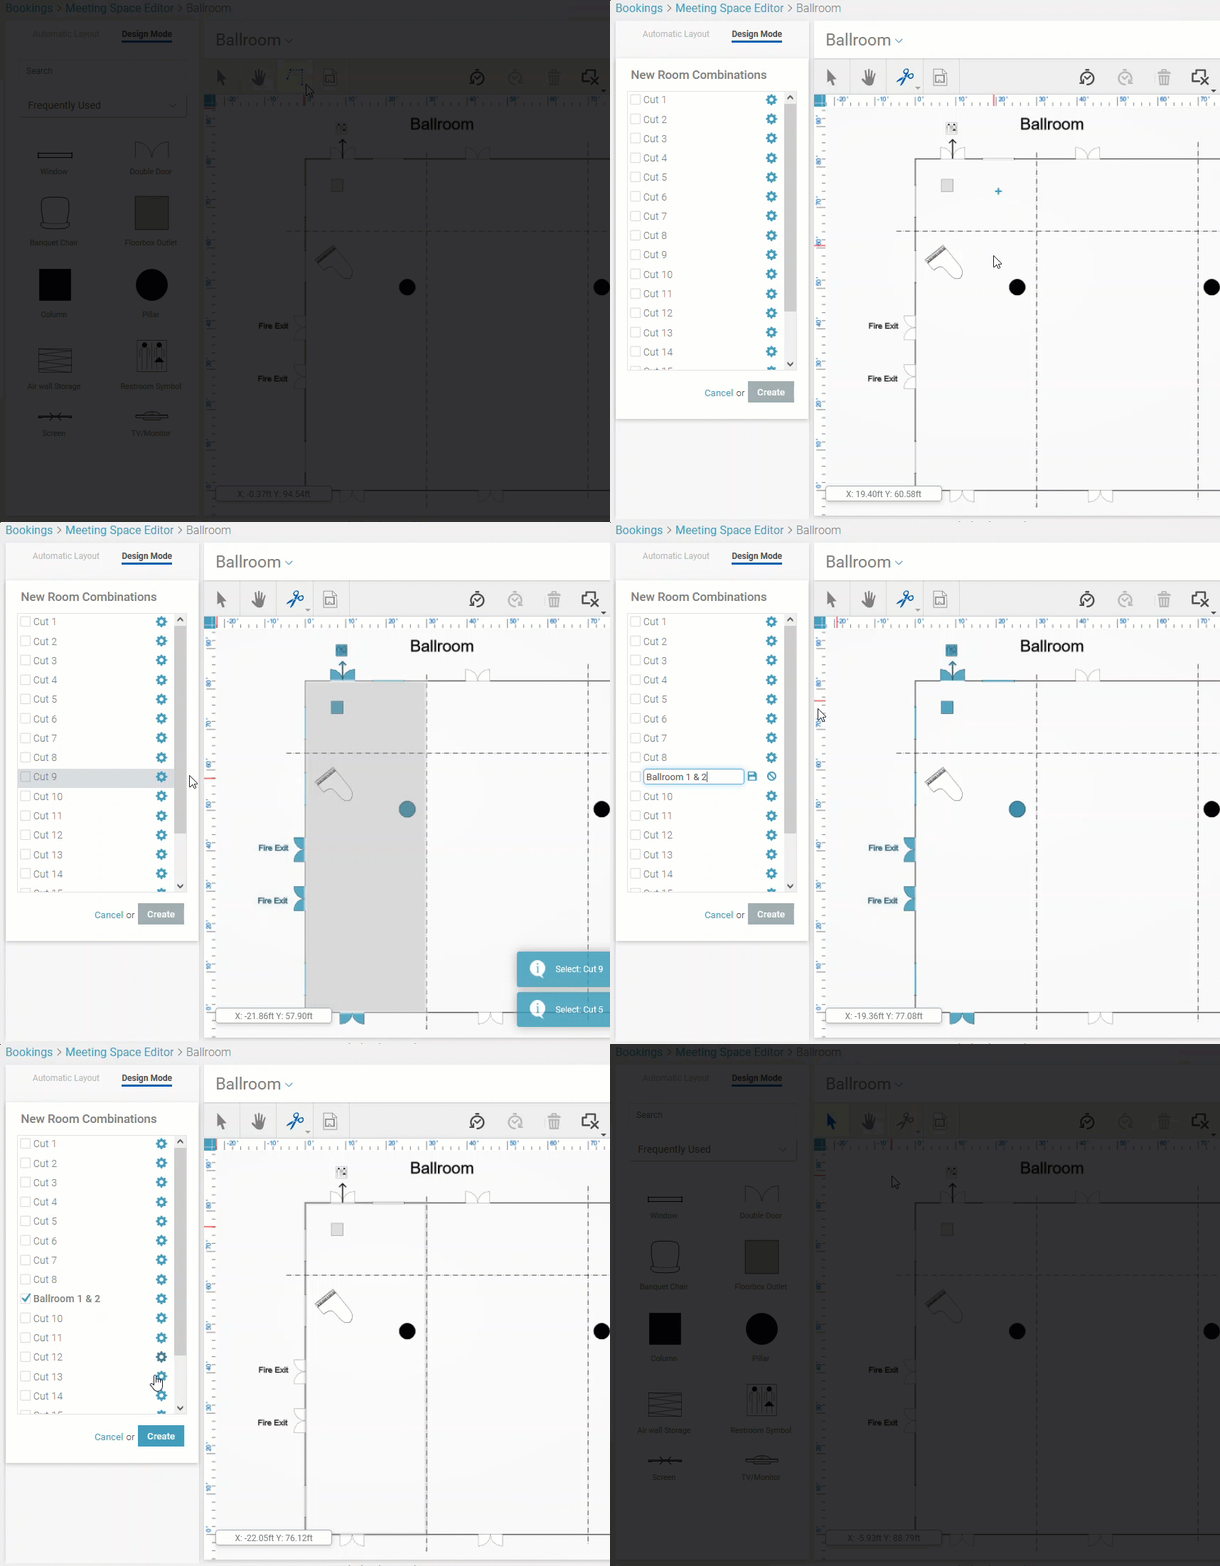
Learn more about creating combination meeting spaces.
If your property has not been blessed with straight walls, this one really speeds things up. When creating a new meeting space, you can copy and paste the outline of an existing room. There's no need to spend time drawing every nook and cranny—speed up the process by copying the outline you created. You can even turn it over to the opposite side, just like flipping a pancake. You'll have beautiful symmetry in a flash. If you have another similar room, copy and paste the entire room outline—fixed resources and all!
To copy a room outline:
-
Select the outline.
-
Click
 Clipboard and select Copy.
To paste a room outline:
-
Open the meeting room, or create a new one.
-
Click
 Clipboard and select Paste.
To flip a room outline:
-
Select the outline.
-
Click
 Arrange .
 -
Select Flip Horizontal to turn the room over from left to right, or select Flip Vertical to turn over from top to bottom.
After tweaking the outline of your new room, if it's not quite in the center of the canvas, click View  and select Center Diagram.
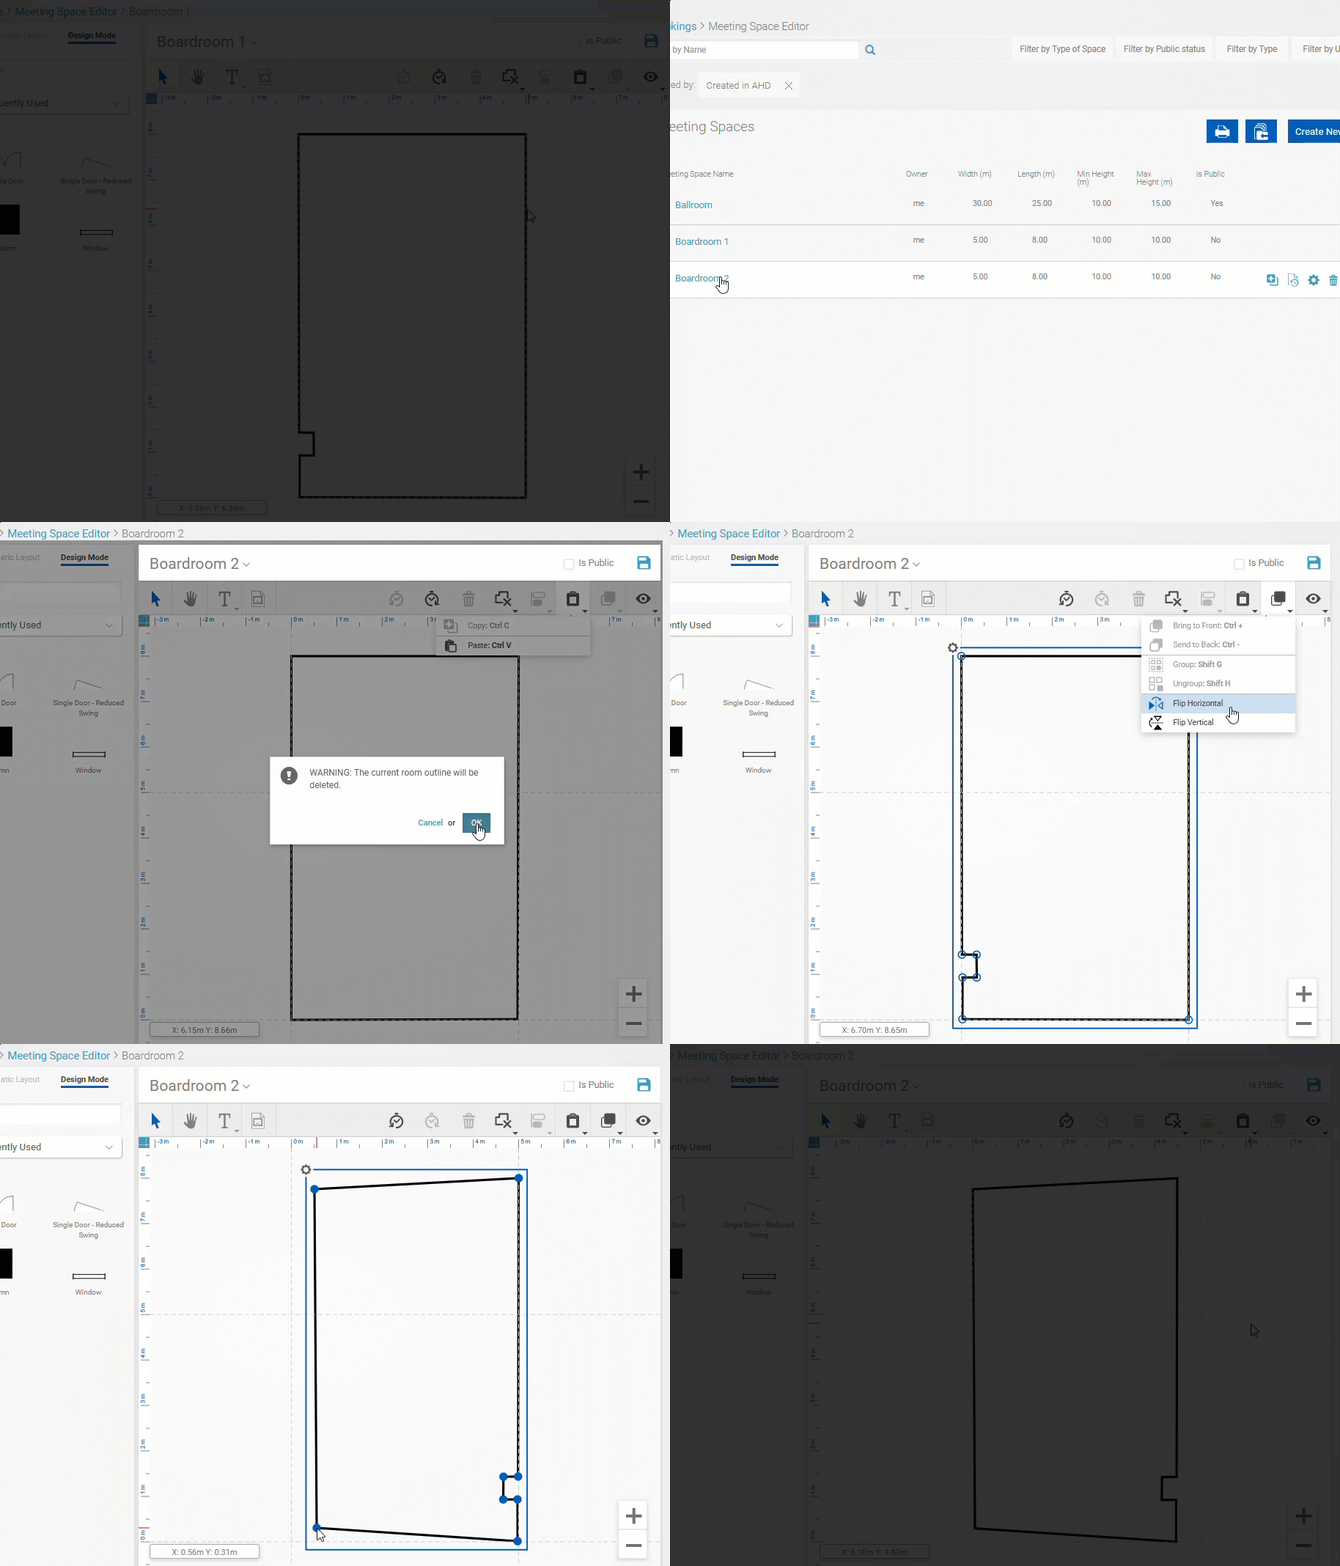
Website Edition
All users
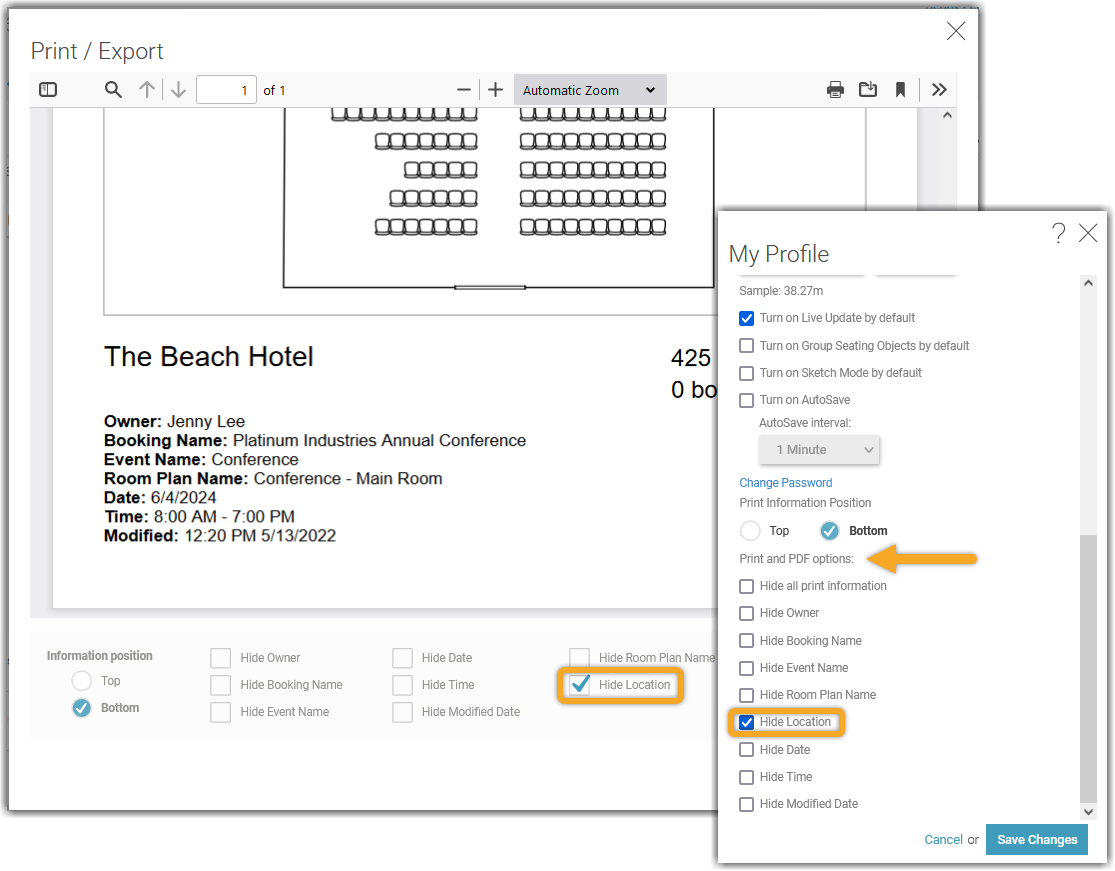
You now have the option to hide the location of the room when printing, exporting, or batch printing room diagrams. Just like with other print labels, you can choose to show or hide this by default in your user profile.
